
Meet Piskel and Save Your First Project
- Your First Pixels
- 20 minutes
- Beginner art · Ages 8+
Find the tools, test a few pixels, and keep an editable project.
Downloads
6 files
Start with a blank 32 × 32 canvas in Piskel. Use the character reference as your guide and draw each small part yourself. Keep an editable .piskel save after every lesson; PNG and GIF are exports to share; the .piskel file keeps the editable project and its layer/frame structure. Save your own work before importing a comparison.
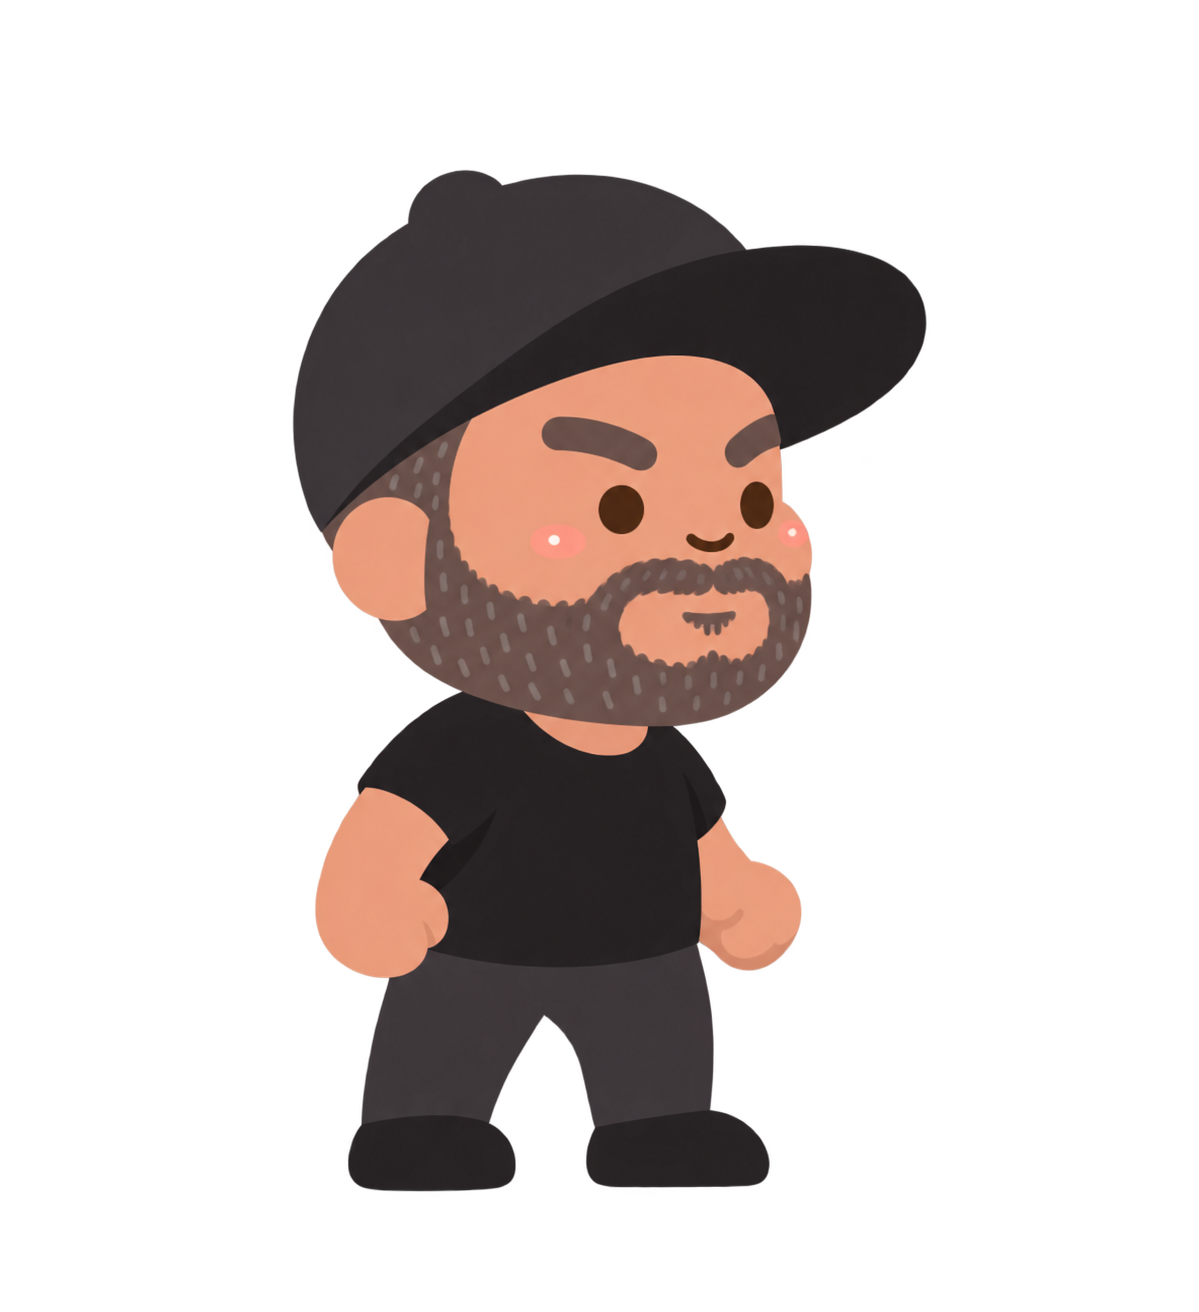
The supplied standing character used as a visual reference. Students draw a simpler pixel version from a blank canvas.
An editable comparison of the completed character and wave. Save your own .piskel before importing another project.
Separate end-of-lesson Piskel files for checking your progress. Extract the ZIP and open only the comparison you need.

The finished transparent 32 × 32 standing picture, ready to use as one game costume.

All three 32 × 32 frames arranged side by side in one transparent 96 × 32 PNG. Import as a sprite sheet only when your game editor supports it.

A 256 × 256 enlarged animation for previewing or sharing. Keep the editable .piskel project for drawing changes.
Your goal
Find Piskel’s canvas, tools, frames, preview and layers, then save a blank 32 × 32 project.
Pixel art is a picture built from little squares called pixels. We will turn Mr. S’s character into a simple game sprite: a small picture a game can use. The smooth character picture is our reference. Our pixel version will keep its cap, beard, dark shirt and gray trousers.
Use a laptop or desktop with a mouse or trackpad. Work through one picture step at a time. Enlarge any screenshot to inspect a button. You will start with a blank canvas, not a finished starter.
Keep your editor tab open. When you move to the next lesson on this website, continue drawing in the same Piskel tab. Open Piskel opens another blank editor; it does not automatically load your earlier artwork. If you closed the editor, import your latest saved .piskel copy before continuing.
Step 1 — Open a blank Piskel
- Open the Piskel editor from the lesson’s Open Piskel button. Save any other artwork before starting a new sprite.
- Begin with the empty checkerboard canvas. The checkerboard means transparent: there is no painted background.
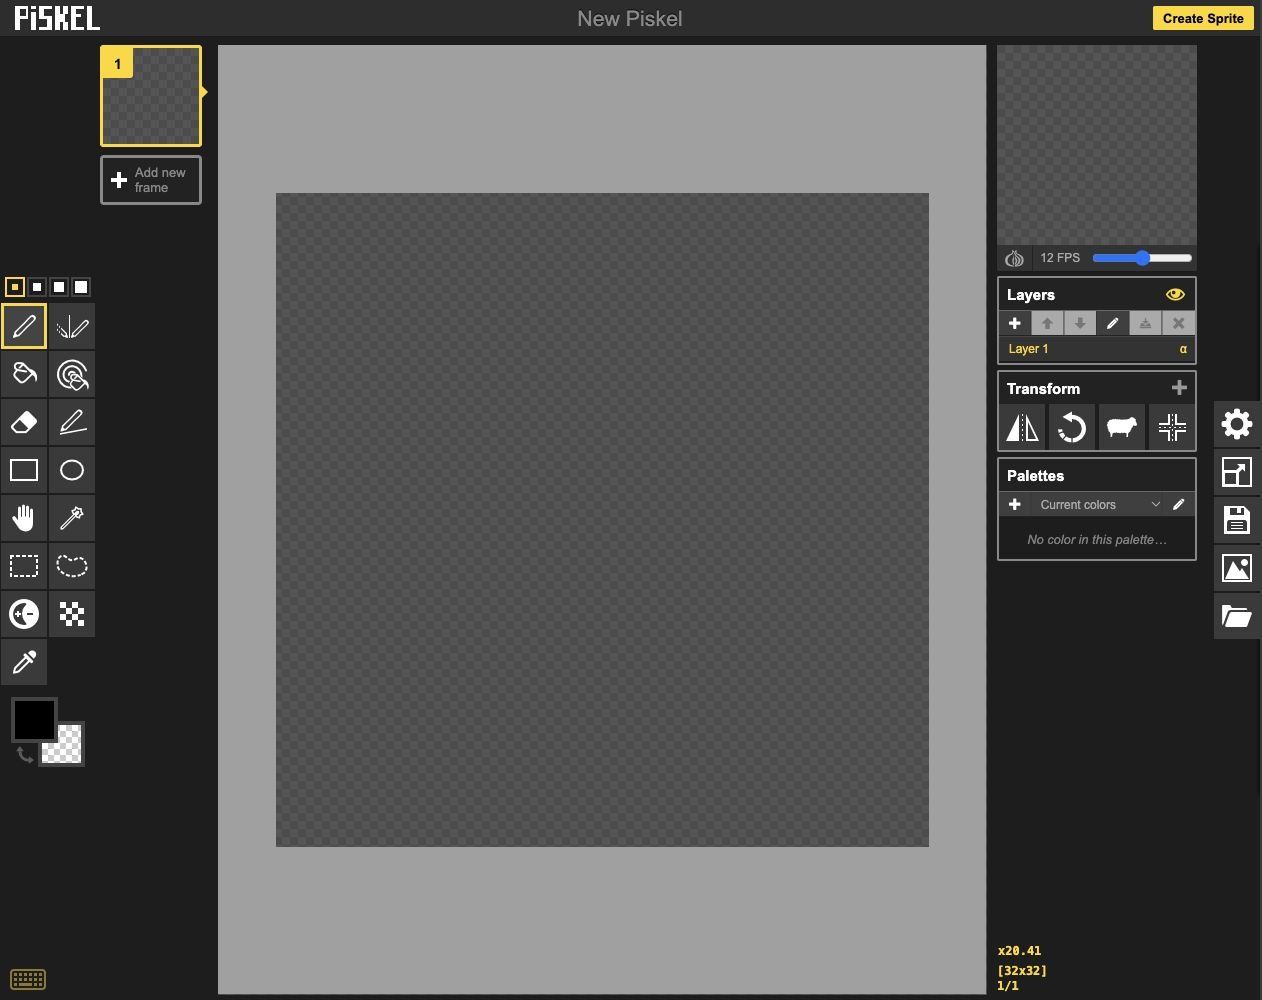
- Check: Start with an empty checkerboard canvas.
- Keep: Keep the first blank frame.
Check: The middle drawing area is empty. There is one frame and one layer.
Step 2 — Find your way around
- Find the tools at the far left, the frame list beside them, and the large canvas in the middle.
- Find the small preview, Layers and Palettes on the right. The far-right controls open settings, resizing, saving, exporting and importing.
- Point to each area while explaining its job: tools make marks; frames make animation; layers separate parts of a drawing.
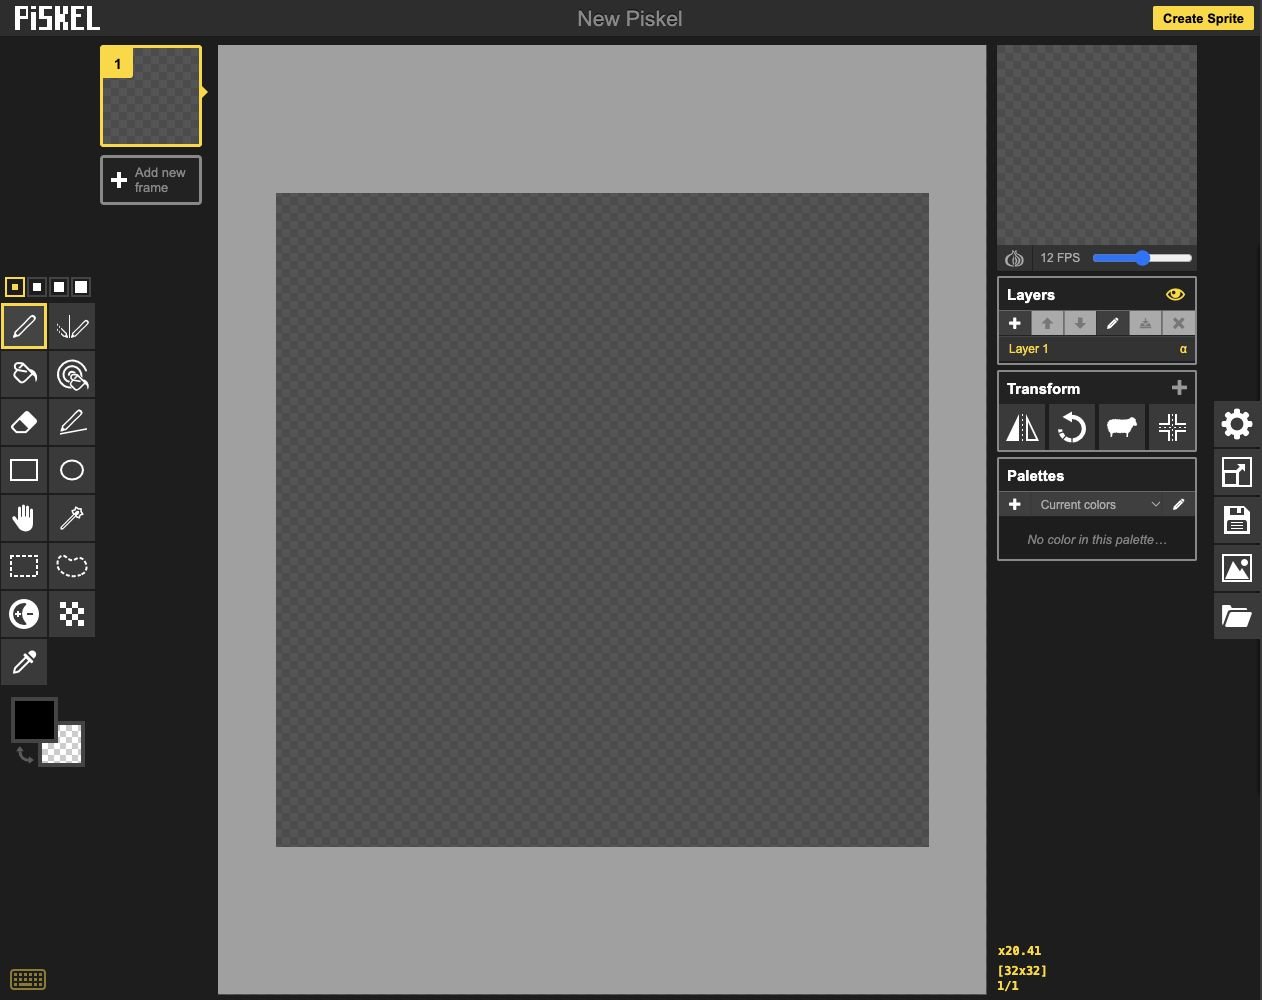
- Click: Drawing tools change the selected frame.
- Click: Frames make a sequence of pictures.
- Check: Draw on the large canvas.
- Check: Watch the small combined preview.
- Check: Layers and Palettes organize your artwork.
Check: You can point to the drawing canvas and the small preview without confusing them.
Step 3 — Check the canvas size
- Open the Resize control on the right. Check that width and height are both 32 pixels.
- If the blank project already says 32 × 32, leave it that size. Keep Maintain aspect ratio checked and Resize canvas content unchecked, then return to the canvas. Zooming the editor makes the squares look larger; it does not add pixels to the picture.
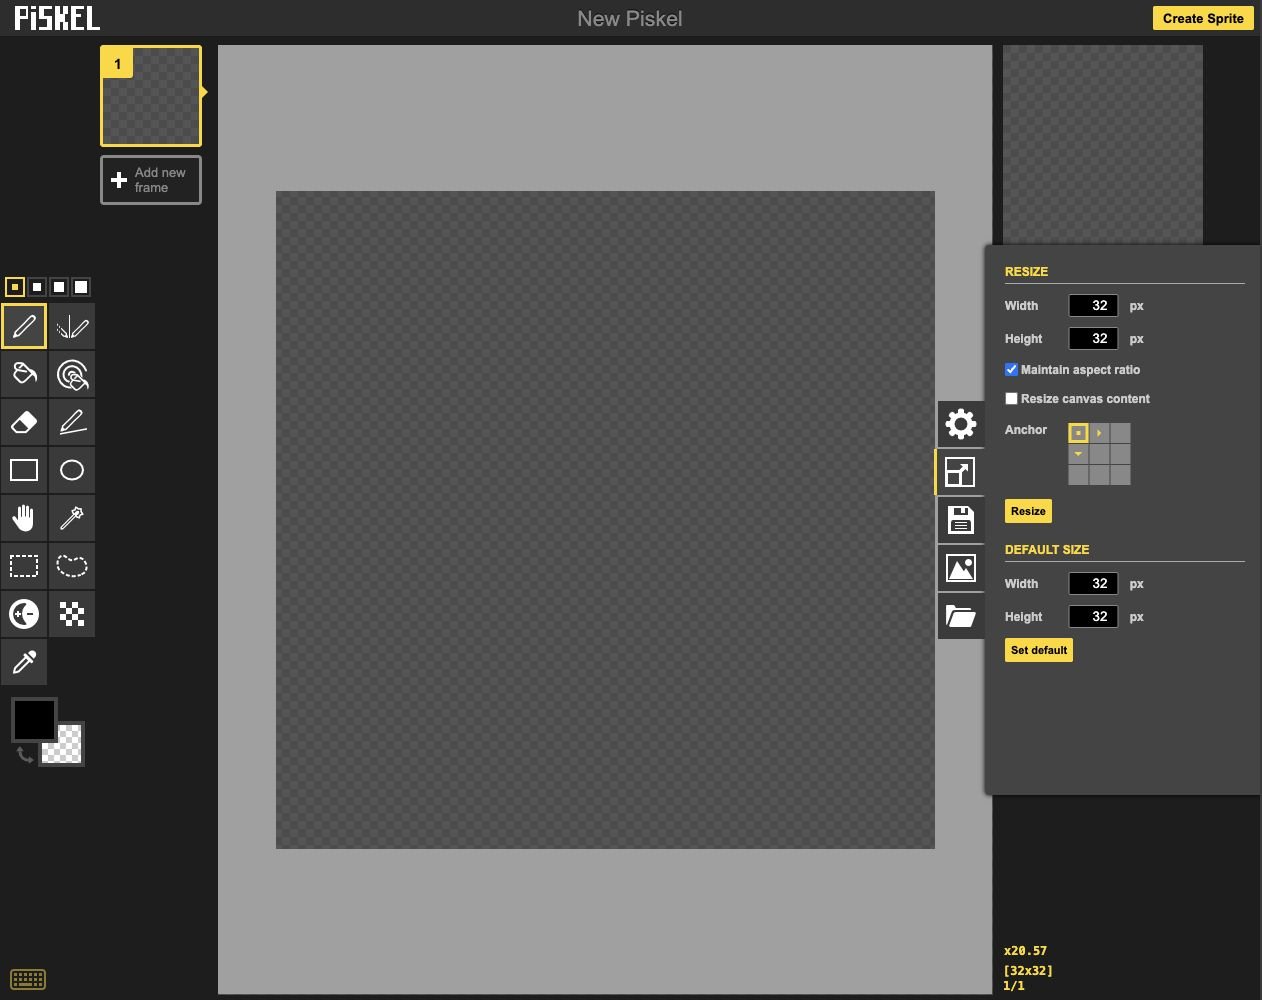
- Check: Check Width 32 and Height 32.
- Keep: Keep these resize options as shown.
Check: Your artwork has 32 columns and 32 rows. The screenshot may look large because the editor is zoomed in.
Step 4 — Try the pen and undo
- Select the Pen tool (P) and its smallest, one-pixel brush. Click a few separate squares on the canvas.
- Press Command + Z on a Mac, or Ctrl + Z on Windows or a Chromebook, to undo the practice marks. Return to the empty checkerboard before continuing.
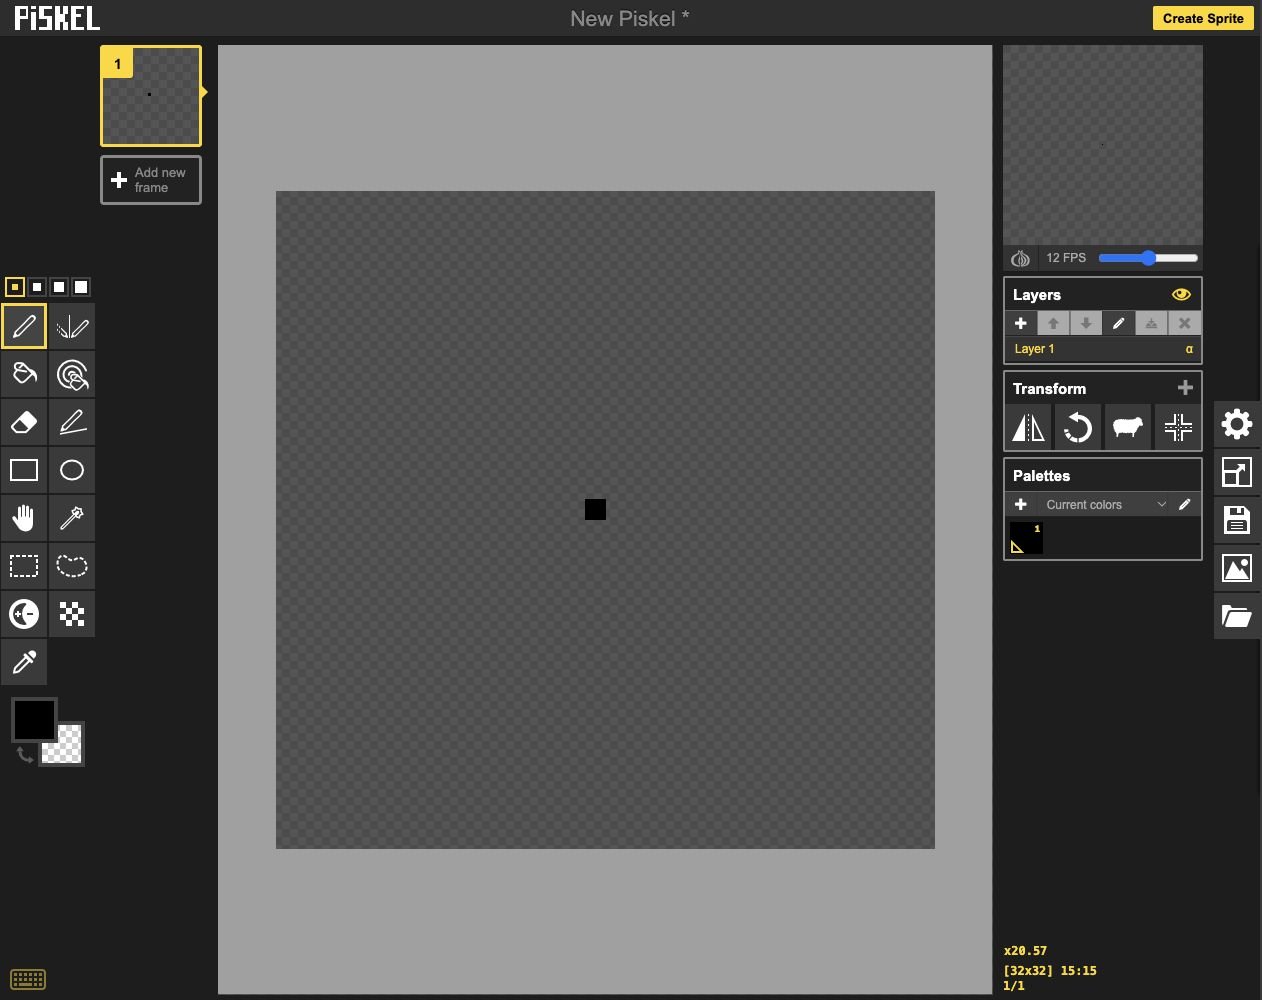
- Click: Select the Pen tool (P).
- Check: This is one painted pixel.
- Keep: Use the smallest brush size.
Check: One click paints one pixel. Undo removes the latest drawing action.
Step 5 — Name the first layer
- Find the first entry in Layers. Click the pencil button, Edit layer name, type Base in the field, then press Enter.
- Keep Base selected. This layer will hold the large head, cap and body shapes.
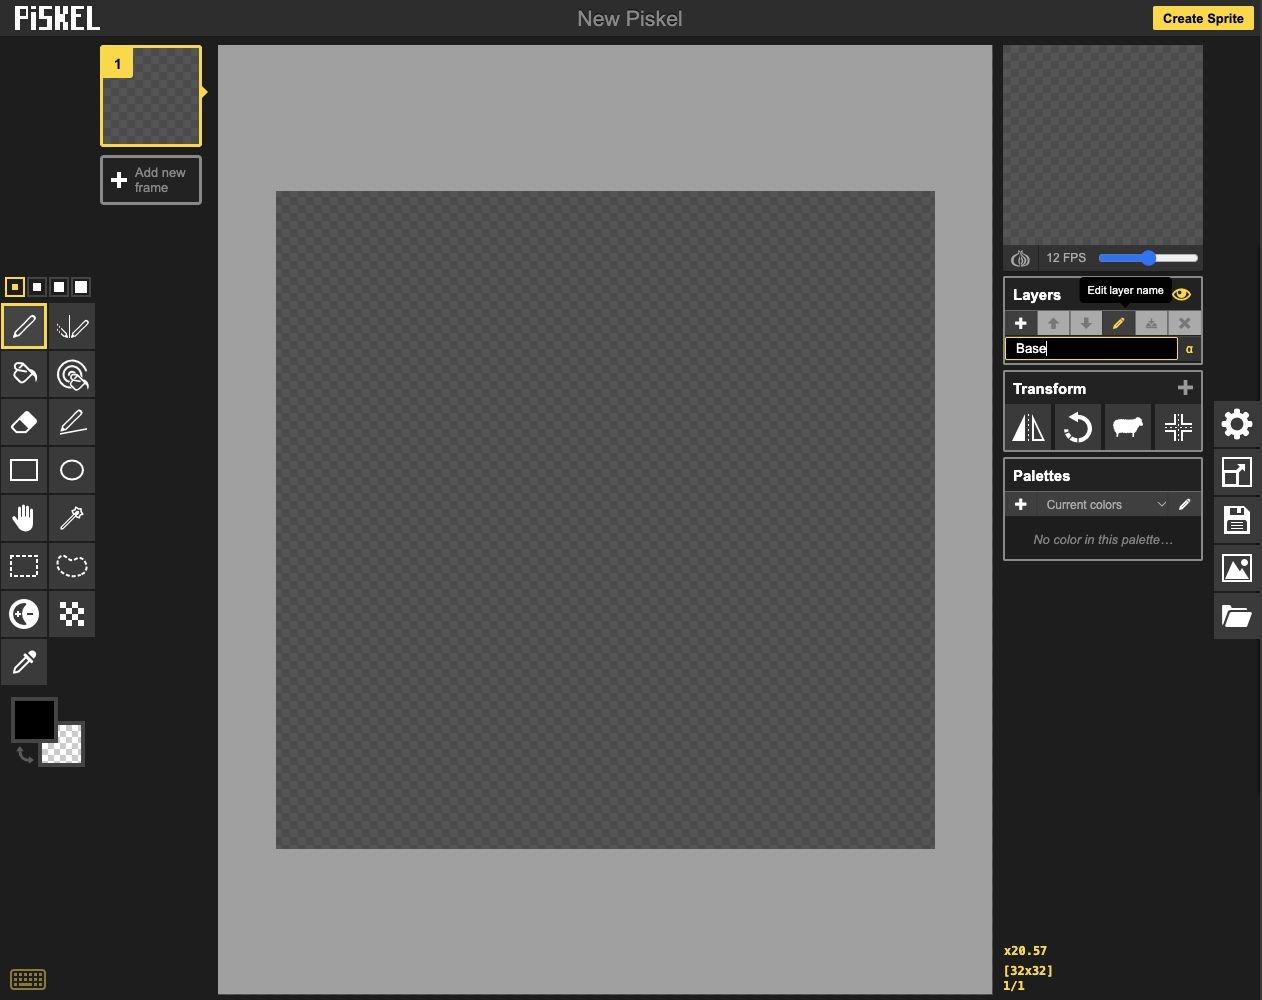
- Click: Choose Edit layer name.
- Add: Type Base and press Enter.
Check: The Layers list contains one selected layer named Base.
Step 6 — Name your project
- Click the floppy-disk Save control on the right. In Sprite Information, enter Mr S Pixel Character in the Title field.
- Use this name to recognize your own work later. A downloaded filename may also contain a date or time.
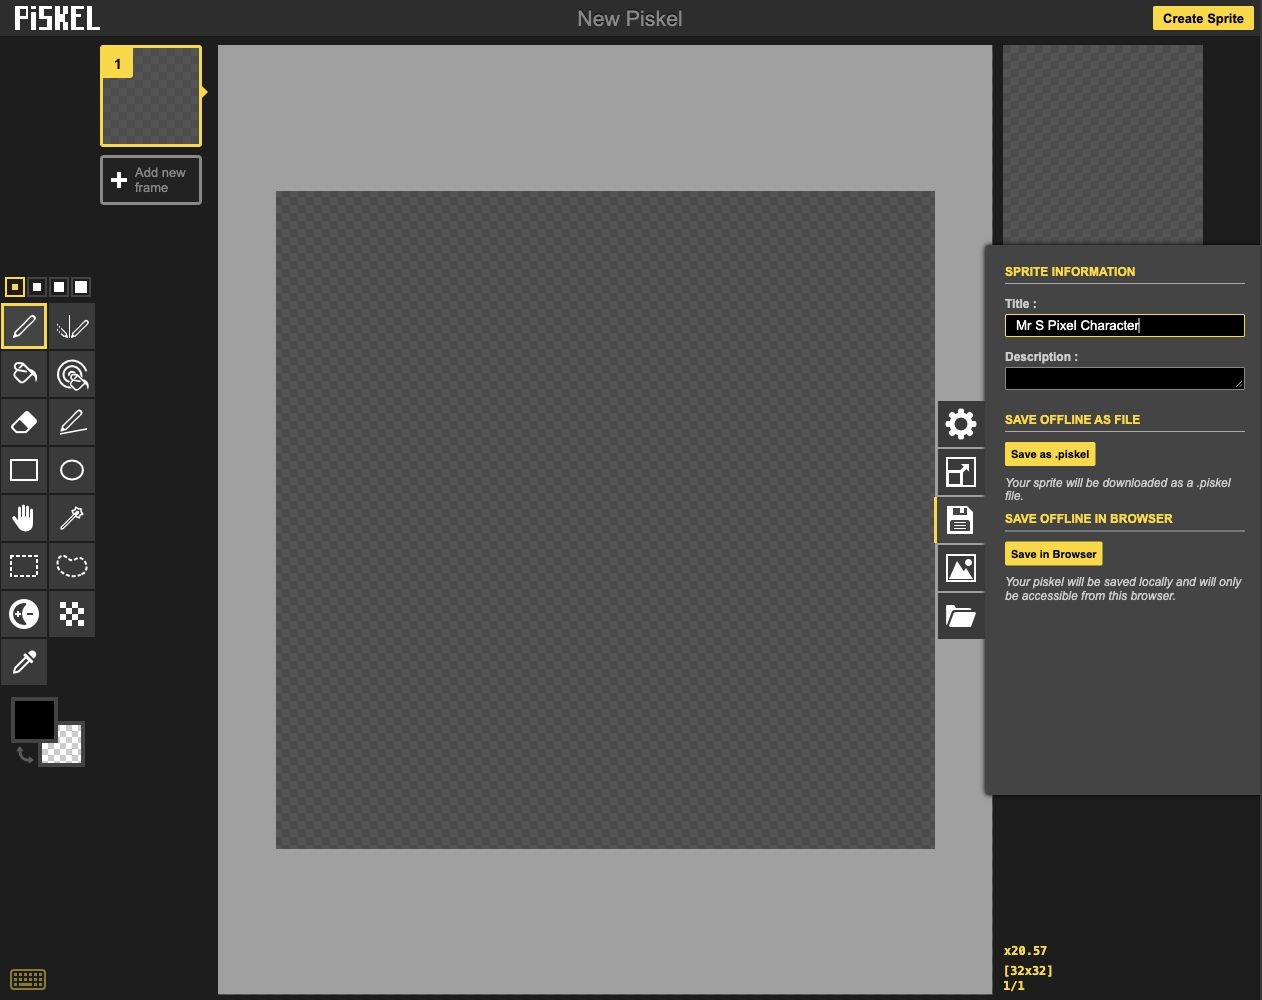
- Click: Open the floppy-disk Save control.
- Add: Enter the project title.
Check: The Title field says Mr S Pixel Character. The project name will be applied when you save.
Step 7 — Save an editable copy
- Click Save as .piskel. Keep the downloaded file in a folder for this course. Ask an adult for help locating downloads if needed.
- A .piskel file keeps your editable frames and layers. Save another copy after each lesson. Browser storage alone is not a portable project file.
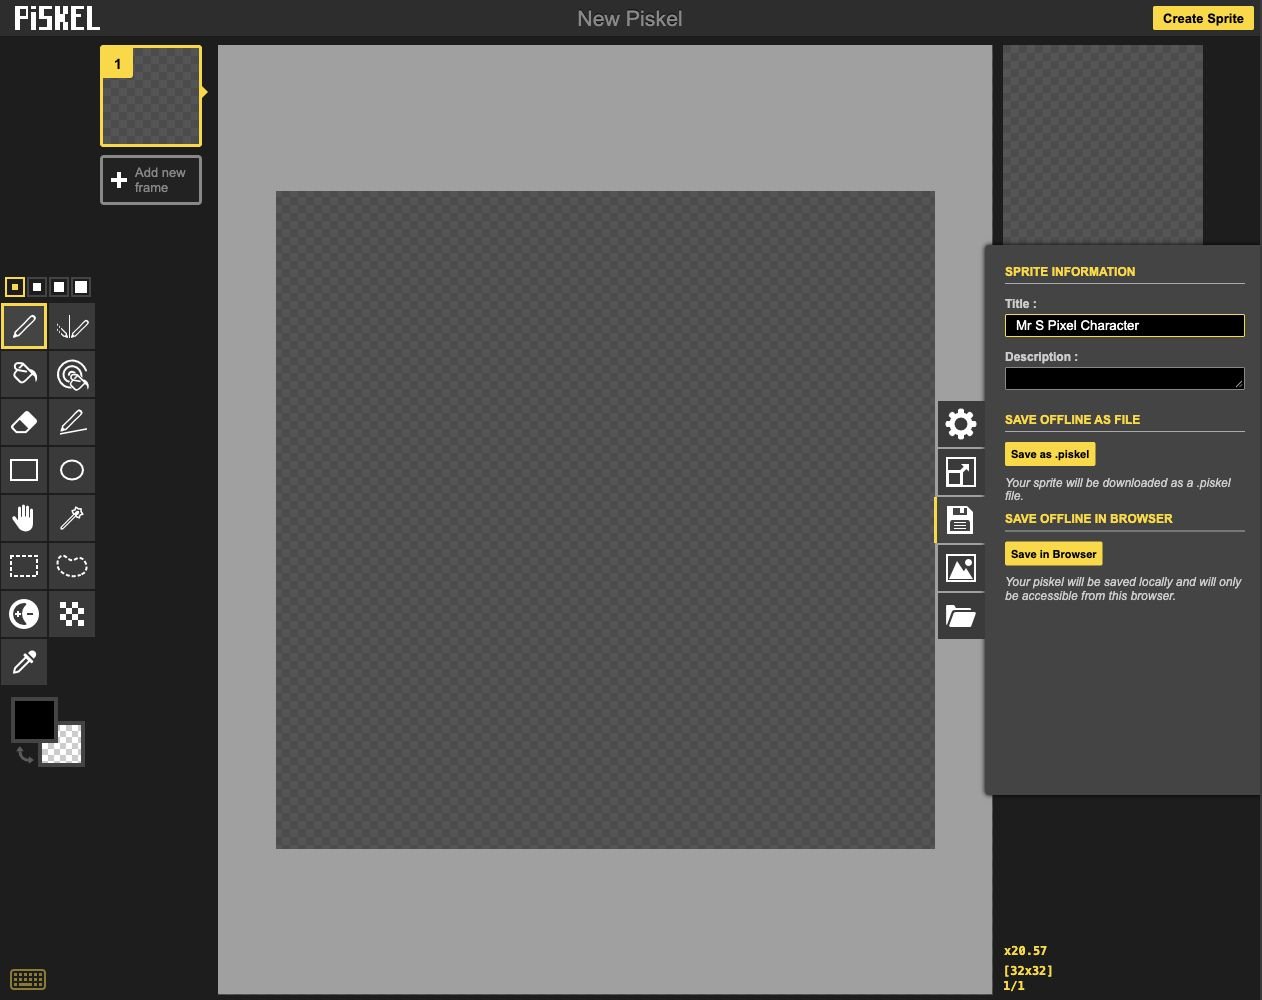
- Click: Download an editable .piskel file.
- Check: Browser storage is local to this browser.
Check: You can find a .piskel file on your computer. The canvas is still blank and ready for the first drawing.
Ready for the next step?
Return here anytime to review.
Lesson discussion
Ask a question or help a classmate. Mr. S can reply here.
Loading discussion…