
Draw the Head and Cap
- Your First Pixels
- 30 minutes
- Beginner art · Ages 8+
Use a small color family and a clear, stepped silhouette.
Downloads
6 files
Start with a blank 32 × 32 canvas in Piskel. Use the character reference as your guide and draw each small part yourself. Keep an editable .piskel save after every lesson; PNG and GIF are exports to share; the .piskel file keeps the editable project and its layer/frame structure. Save your own work before importing a comparison.
The supplied standing character used as a visual reference. Students draw a simpler pixel version from a blank canvas.
An editable comparison of the completed character and wave. Save your own .piskel before importing another project.
Separate end-of-lesson Piskel files for checking your progress. Extract the ZIP and open only the comparison you need.

The finished transparent 32 × 32 standing picture, ready to use as one game costume.

All three 32 × 32 frames arranged side by side in one transparent 96 × 32 PNG. Import as a sprite sheet only when your game editor supports it.
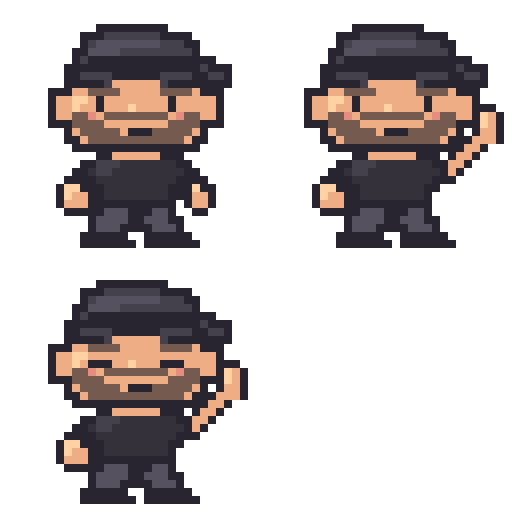
A 256 × 256 enlarged animation for previewing or sharing. Keep the editable .piskel project for drawing changes.
Your goal
Choose a limited palette and draw a recognizable head and cap on the Base layer.
Continue your blank Mr S Pixel Character project. Look at the character before drawing: its head is large, the cap reaches out on one side, and the body is smaller. We will simplify those shapes instead of copying every smooth detail.
Step 1 — Study the character
- Look at Mr. S’s reference picture. Name three features that make the character recognizable.
- Keep room below the head for a shirt, legs and shoes. Leave a little checkerboard around the whole character.
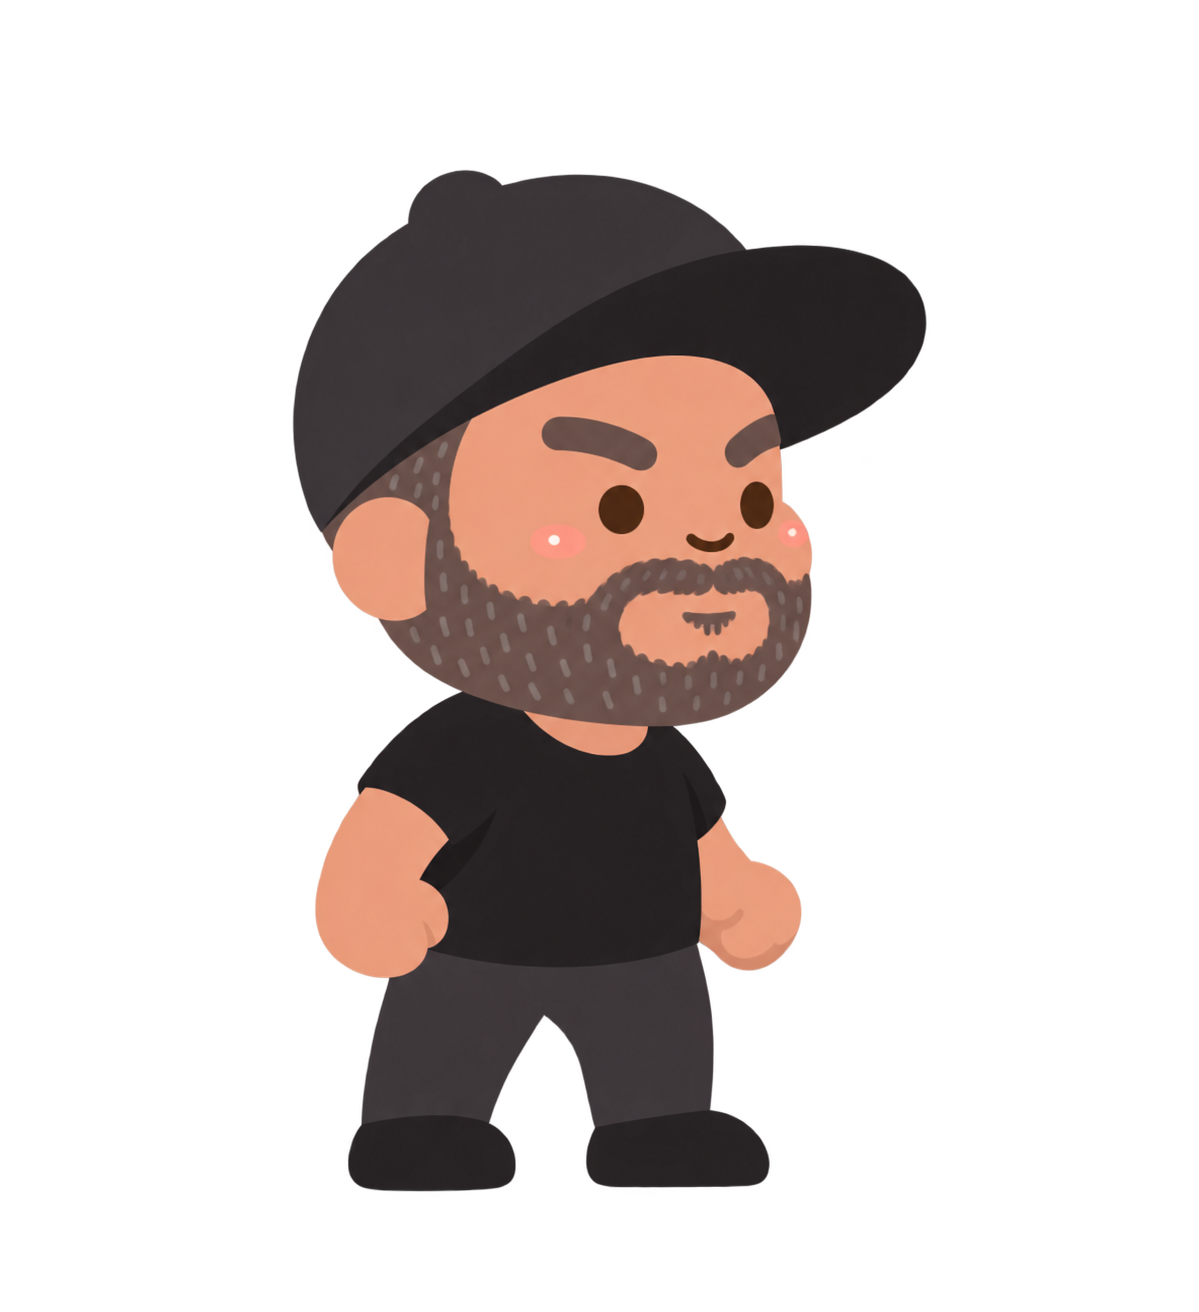
Check: You have a plan for the cap, large face and small body before adding pixels.
Step 2 — Choose a small palette
- Click the main color square below the tools. Choose a color using its hex code, a label beginning with #.
- Use these main colors as you need them: outline #282530; cap #44404c; skin #efad86; beard #755a50; shirt #34313a; trousers #56515f; highlight #ffd1a3.
- Keep the palette small. You do not need a new color for every pixel.
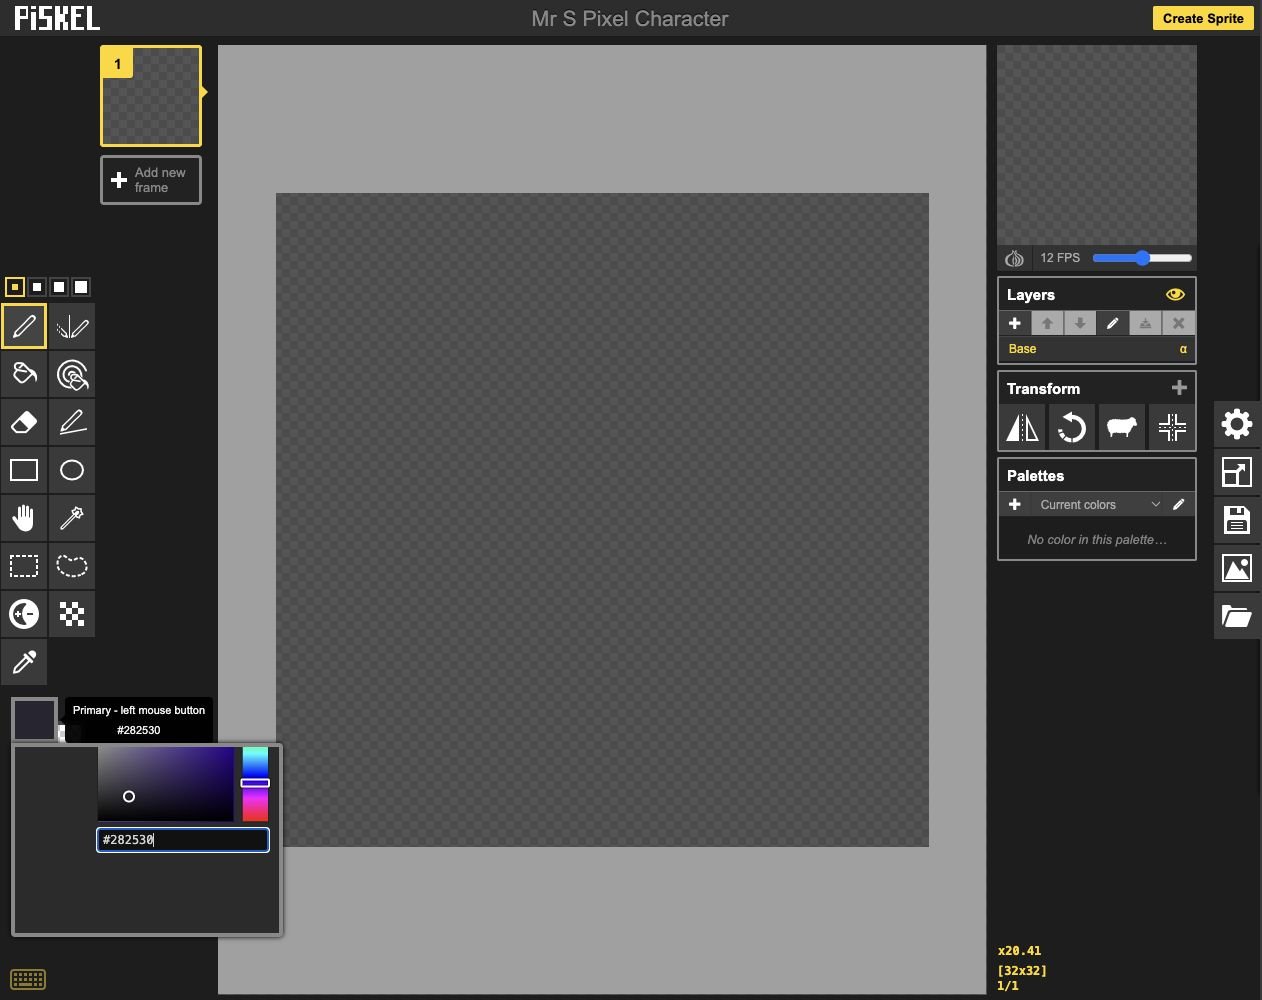
- Click: Open the primary color square.
- Add: Enter #282530 in the hex field.
Check: You can choose the dark outline color and find the selected color square again.
Step 3 — Draw the head shape
- Select Base and the one-pixel Pen. With the outline color, draw a large closed head shape in the upper part of the canvas.
- Make corners with short stair steps. Leave the bottom part of the canvas empty for the body. Use the screenshot for the proportions.
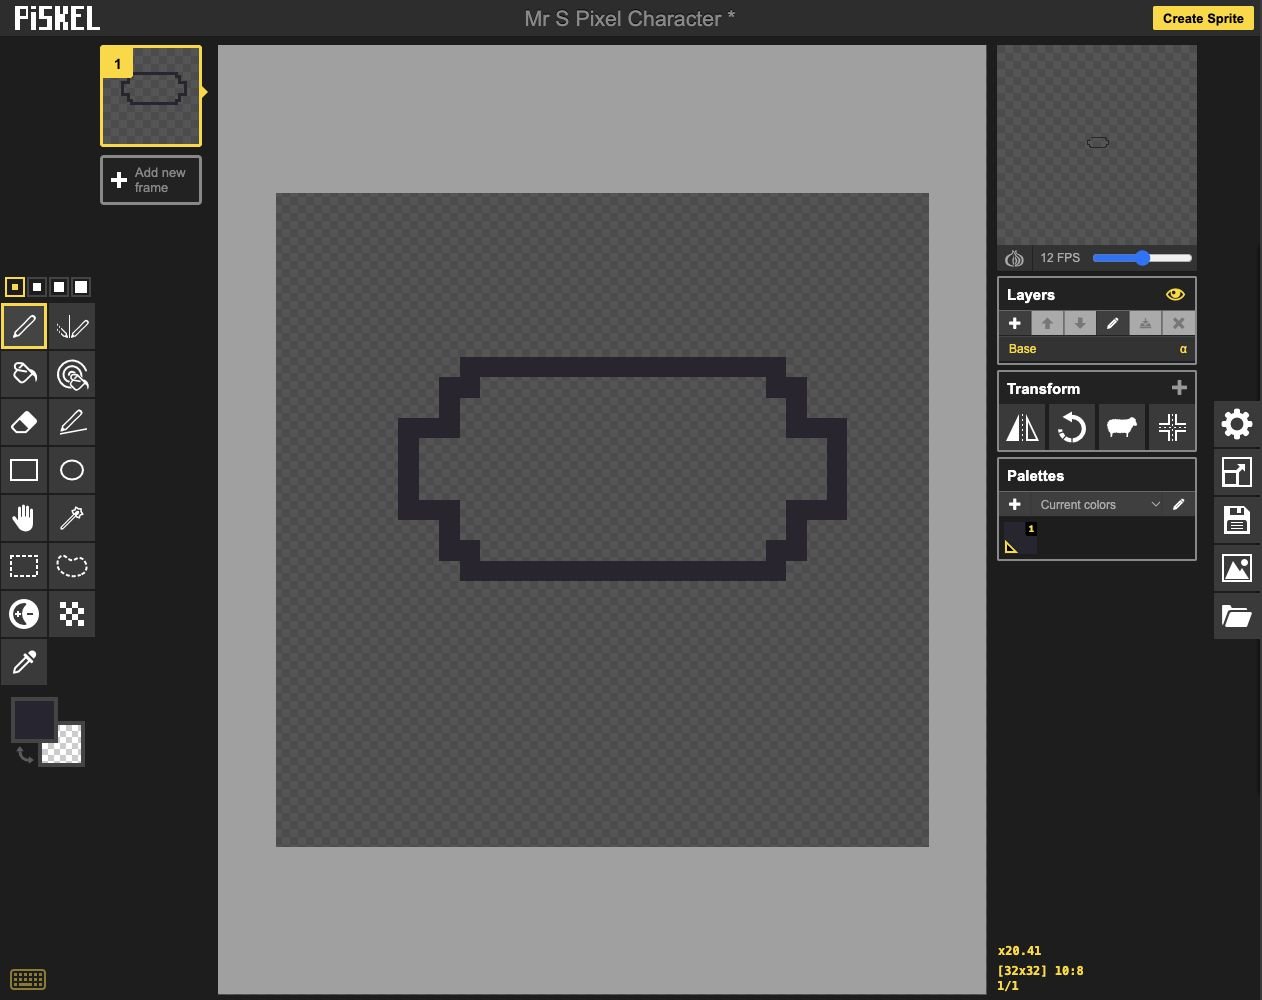
- Add: Draw one closed head shape.
- Keep: Leave room for the body and feet.
Check: The head outline forms one closed shape, with no gaps for color to escape through.
Step 4 — Draw the cap crown
- Use the outline color to add the rounded top of the cap above the face.
- Keep it simple: a few short horizontal and vertical runs can suggest a curved cap. Match the broad shape in the picture before adding tiny details.
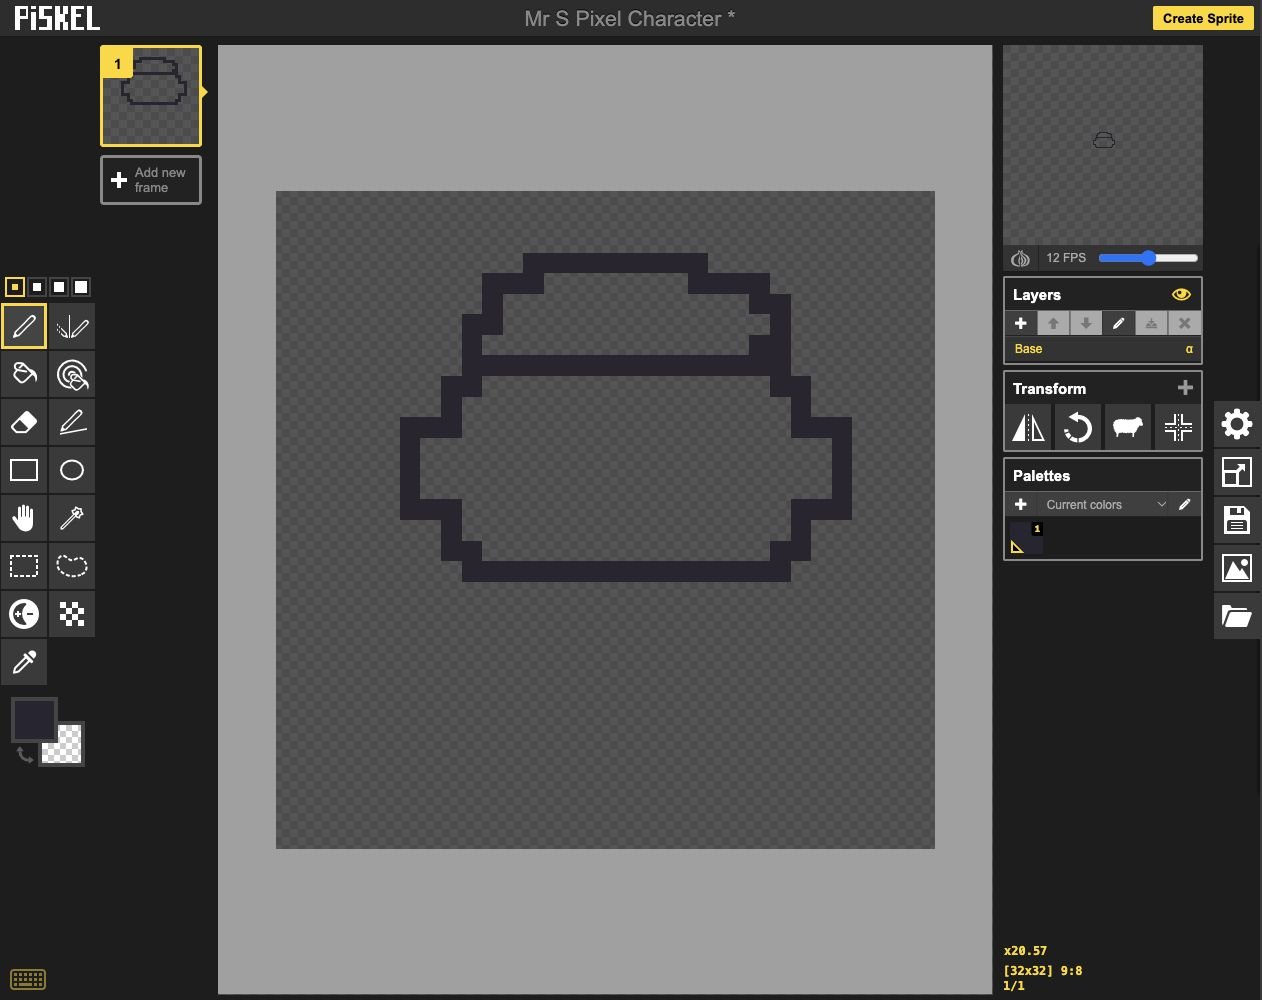
- Add: Add the cap crown with stepped edges.
Check: The cap sits on the head and is wider near its lower edge.
Step 5 — Add the cap brim
- Extend the cap brim to the character’s right, as shown in the screenshot.
- Join the brim to the crown. Repair any accidental gaps with the Pen.
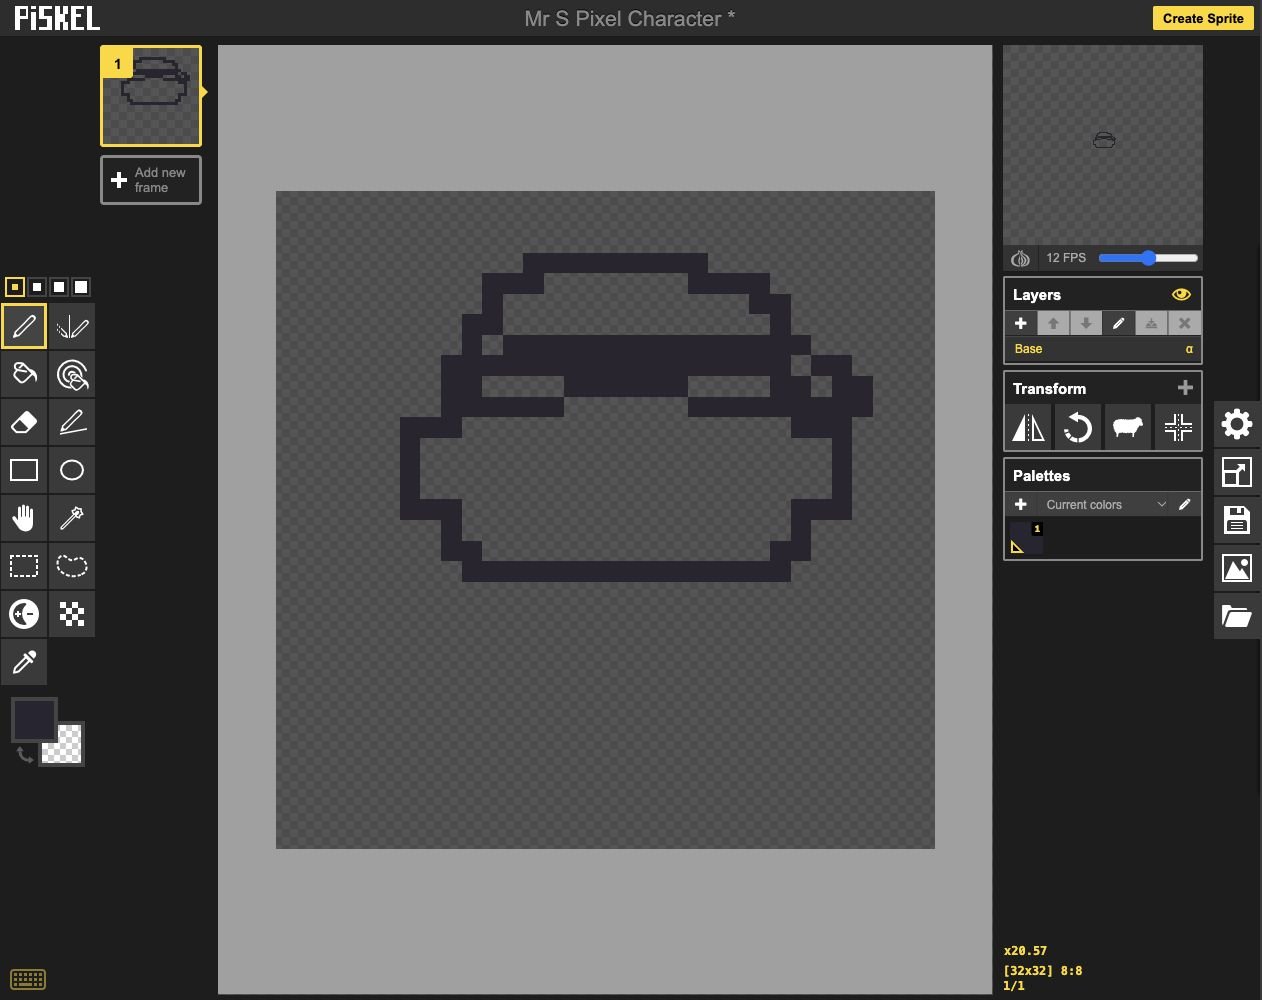
- Add: Extend and join the cap brim.
Check: The outer shape already looks like a person wearing Mr. S’s cap.
Step 6 — Fill the skin and cap
- Choose the skin color and the Paint bucket. Click inside the closed face.
- Choose the cap color and fill the cap. If color floods the wrong area, Undo, close the gap with the Pen, then try again.
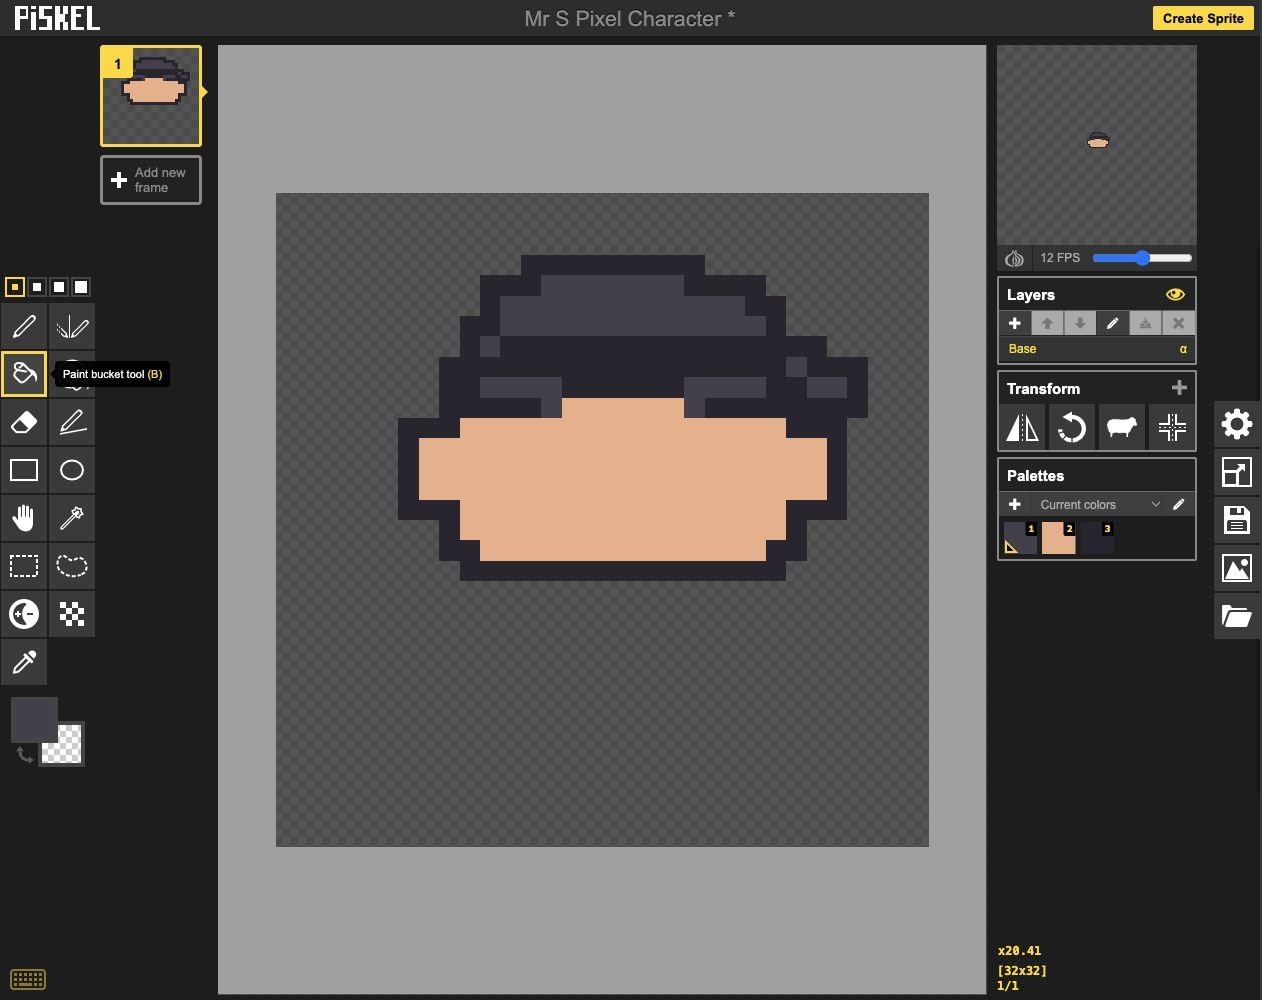
- Click: Use the Paint bucket for closed regions.
- Check: Keep skin and cap colors separate.
Check: Skin and cap have separate solid colors, and the surrounding checkerboard is still clear.
Step 7 — Check the silhouette
- Look at the small preview. A silhouette is the outside shape of a subject. Is the cap readable when the picture is small?
- Use the Pen or Eraser to repair one uneven edge. Save an editable copy of this head-and-cap stage.
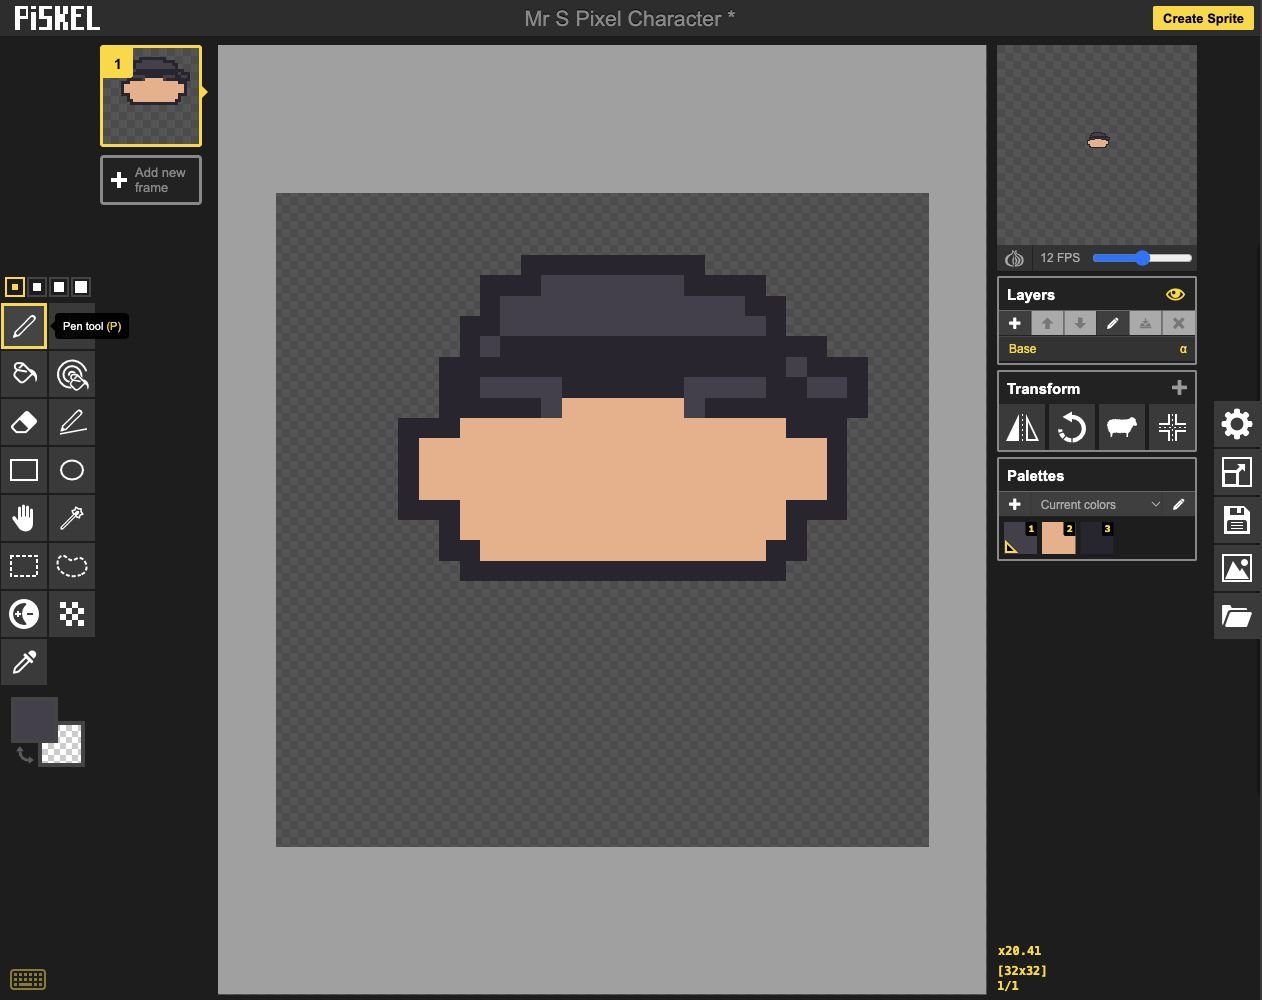
- Check: Check the cap and head silhouette.
- Check: Check the same shape at small size.
Check: The head and cap are easy to recognize even before the eyes or beard are added.
Ready for the next step?
Return here anytime to review.
Lesson discussion
Ask a question or help a classmate. Mr. S can reply here.
Loading discussion…