
Add Light and Clean the Pixels
- Build Your Character
- 25 minutes
- Beginner art · Ages 8+
Use a few highlights and remove stray marks without making the sprite busy.
Downloads
6 files
Start with a blank 32 × 32 canvas in Piskel. Use the character reference as your guide and draw each small part yourself. Keep an editable .piskel save after every lesson; PNG and GIF are exports to share; the .piskel file keeps the editable project and its layer/frame structure. Save your own work before importing a comparison.

The supplied standing character used as a visual reference. Students draw a simpler pixel version from a blank canvas.
An editable comparison of the completed character and wave. Save your own .piskel before importing another project.
Separate end-of-lesson Piskel files for checking your progress. Extract the ZIP and open only the comparison you need.

The finished transparent 32 × 32 standing picture, ready to use as one game costume.

All three 32 × 32 frames arranged side by side in one transparent 96 × 32 PNG. Import as a sprite sheet only when your game editor supports it.

A 256 × 256 enlarged animation for previewing or sharing. Keep the editable .piskel project for drawing changes.
Your goal
Use one light direction, preserve clear outlines, and save a clean standing character.
Shading uses lighter and darker colors to suggest form. A highlight is a lighter area facing the light. We will add only a few highlights so our small sprite stays clear.
Step 1 — Choose one light direction
- Imagine a lamp above and to the character’s left. Keep that same direction for every highlight.
- Select Details. Put new highlight pixels here so you can correct them without repainting the Base shapes.
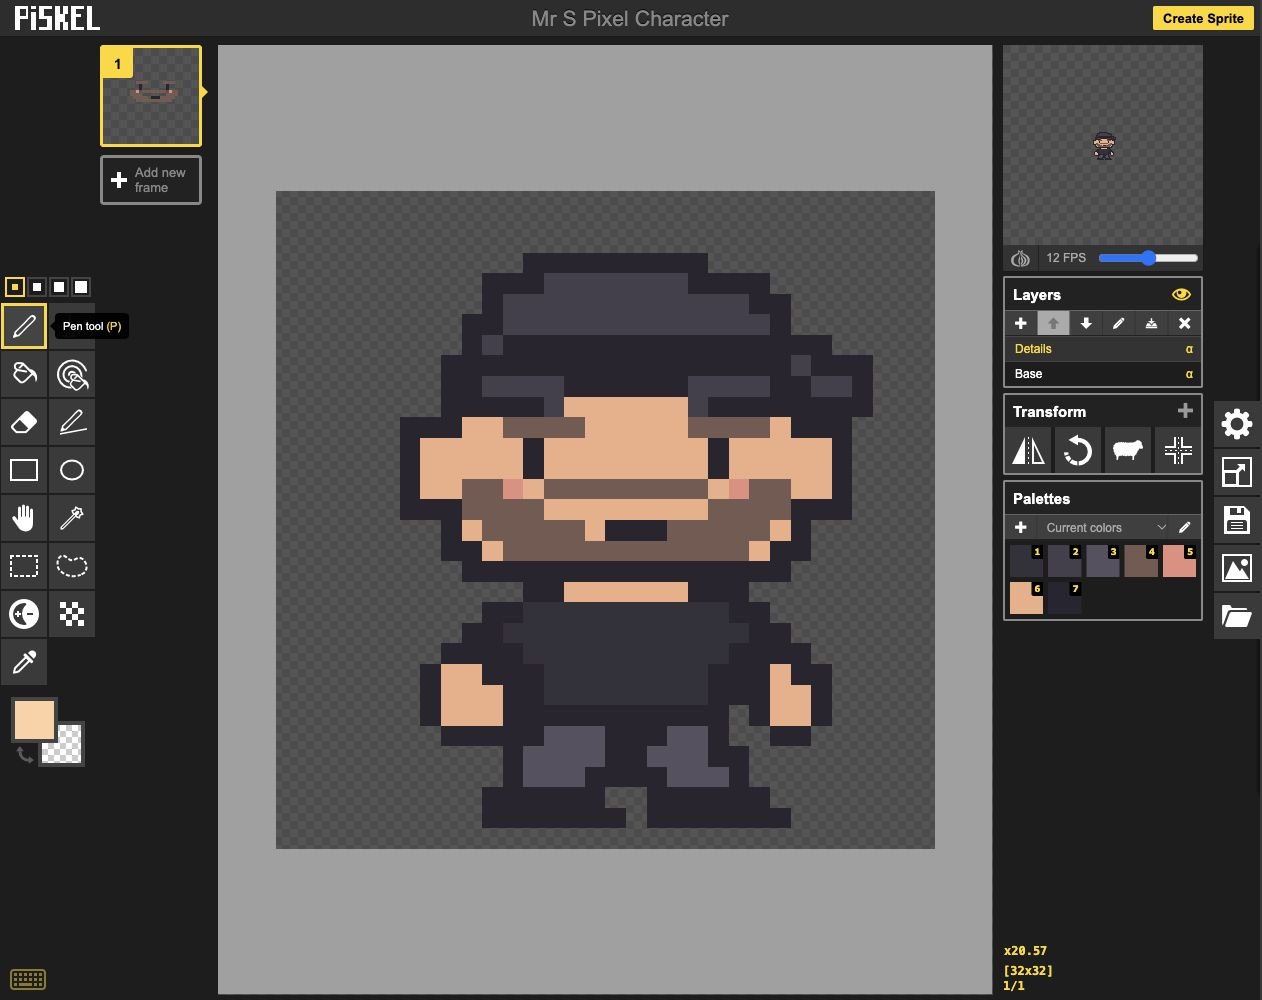
- Click: Select Details for highlights.
- Keep: Use one upper-left light direction.
Check: You can point to the upper-left side of the character as the side facing the light.
Step 2 — Light the face and hands
- Choose #ffd1a3. Add a few highlight pixels on the lit edge of the face and hands.
- Keep the main skin color visible. Do not draw a bright border all the way around the character.
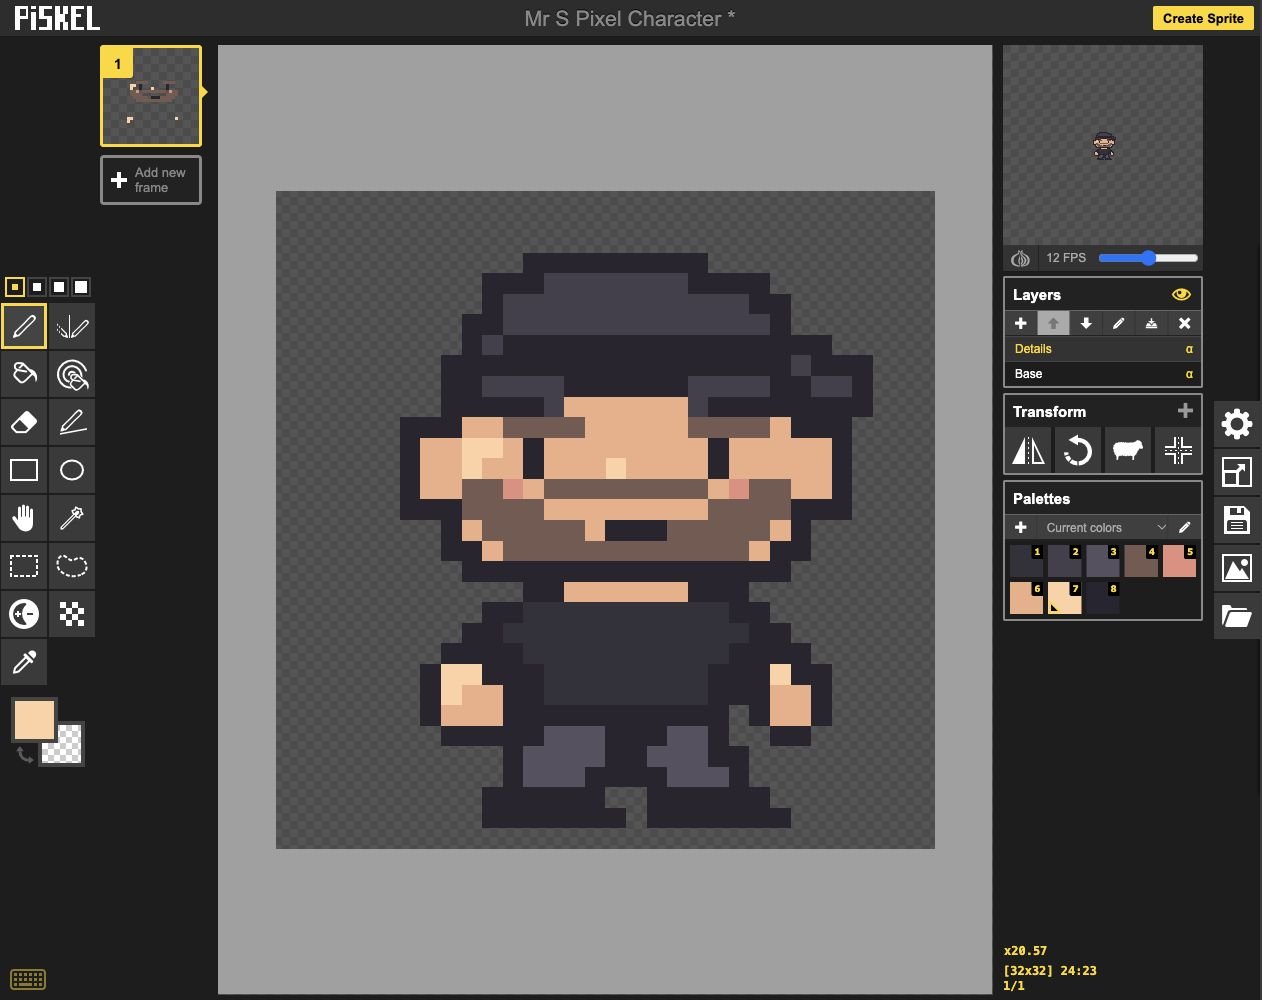
- Add: Use a few light face pixels.
- Add: Add small highlights to the hands.
Check: The highlights follow one light direction and do not cover the eyes or mouth.
Step 3 — Add a cap highlight
- Choose #56515f, the trouser color, and add a short highlight on the upper-left part of the cap. Reusing a color keeps our palette small.
- Keep it inside the cap’s dark outer edge. Use a small stepped patch rather than many isolated specks.
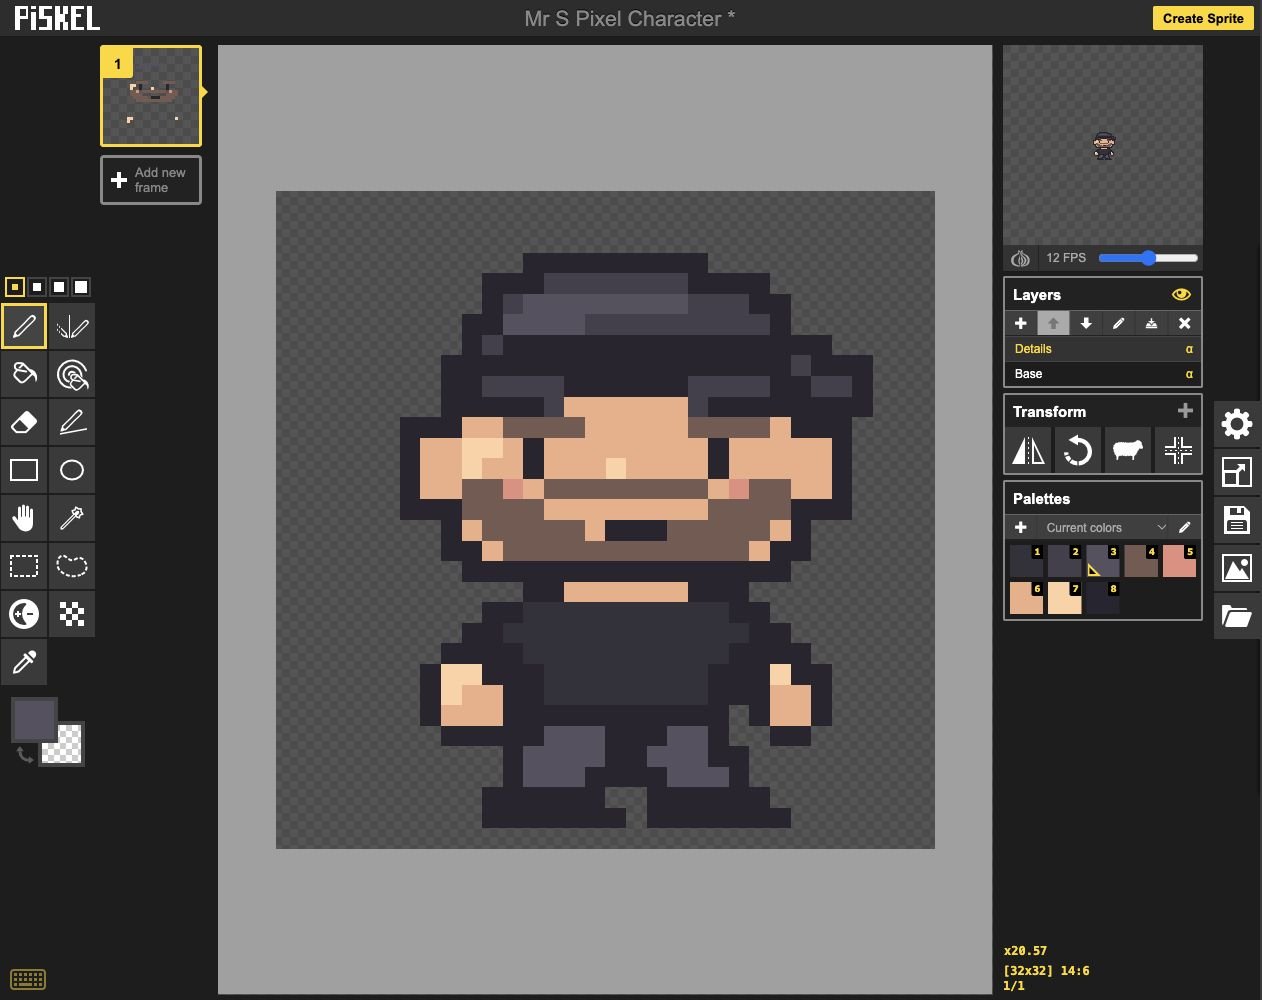
- Add: Keep the cap highlight inside the edge.
Check: The cap has one simple lit area and still looks dark overall.
Step 4 — Separate the clothes
- Use #44404c, the cap color, for the small lit shoulder area of the shirt shown in the picture.
- Keep the shirt and trousers visually different. Leave dark pixels where arms, body and legs need separation.
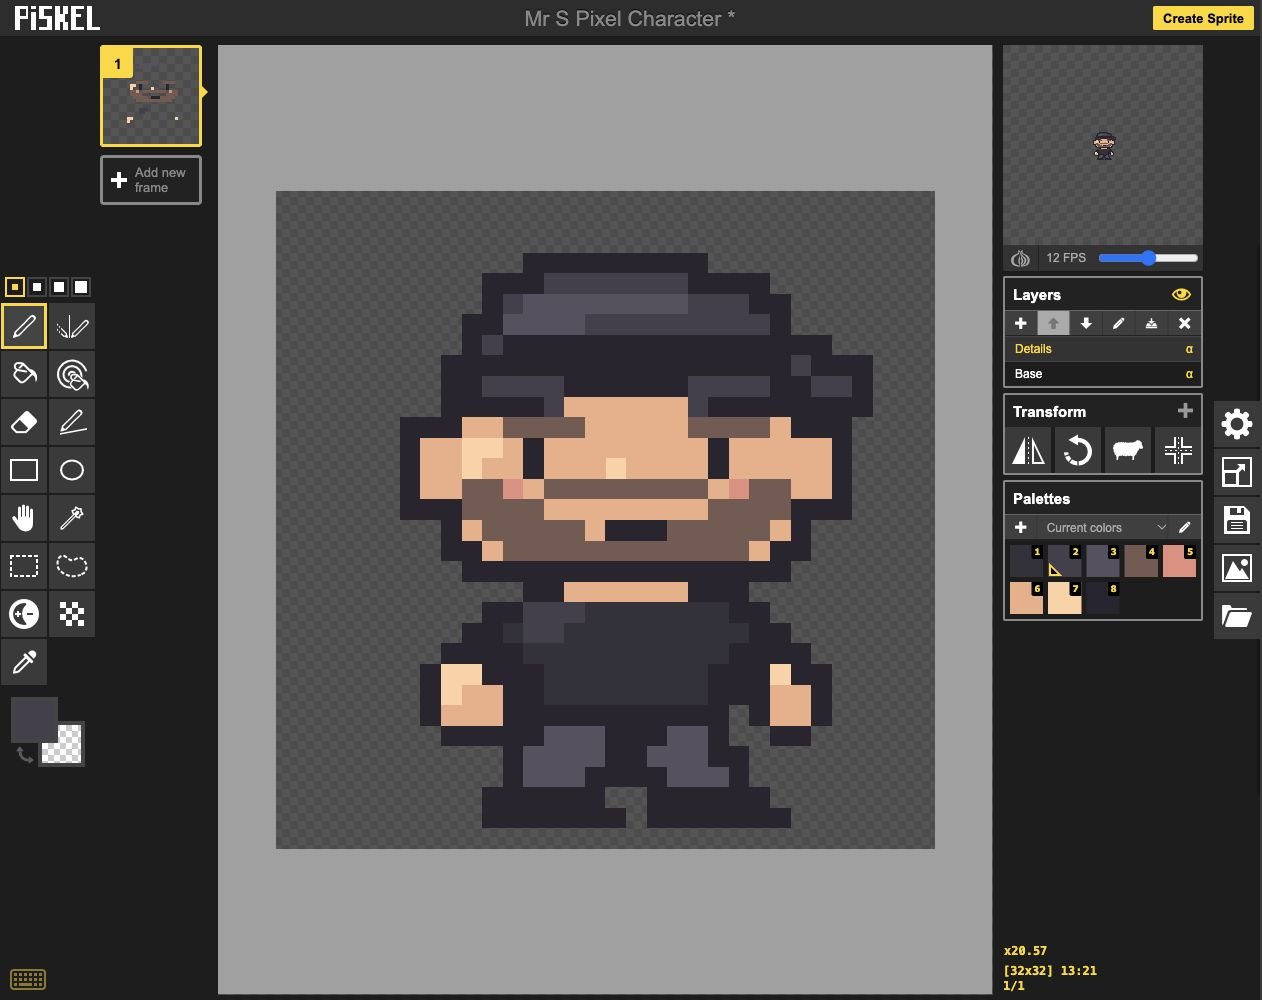
- Add: Add a small lit shoulder area.
- Keep: Keep the two legs separated.
Check: You can still see the shirt, two arms and two legs in the preview.
Step 5 — Clean stray pixels
- The first picture shows an intentional stray pixel above and to the left of the cap; the second shows it erased. Compare the before-and-after pictures. On your own sprite, select the Eraser tool (E) and remove any accidental floating marks you find. You do not need to add a stray pixel first.
- Use the Color picker when you need to reuse a color already in the sprite. Check both Base and Details if a mark remains after erasing.
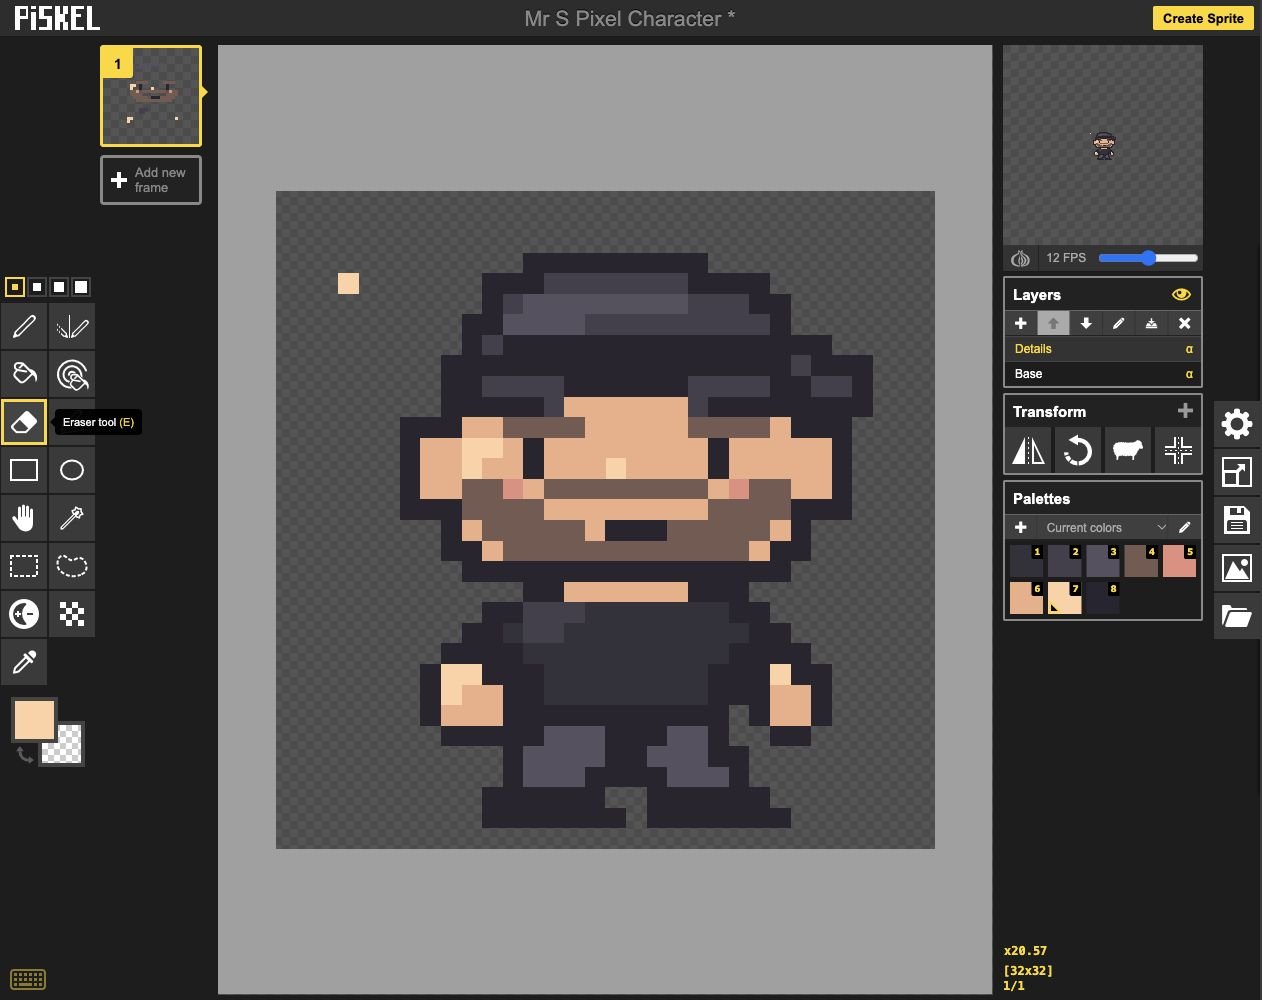
- Click: Select the Eraser tool (E).
- Click: This demonstration pixel will be erased.
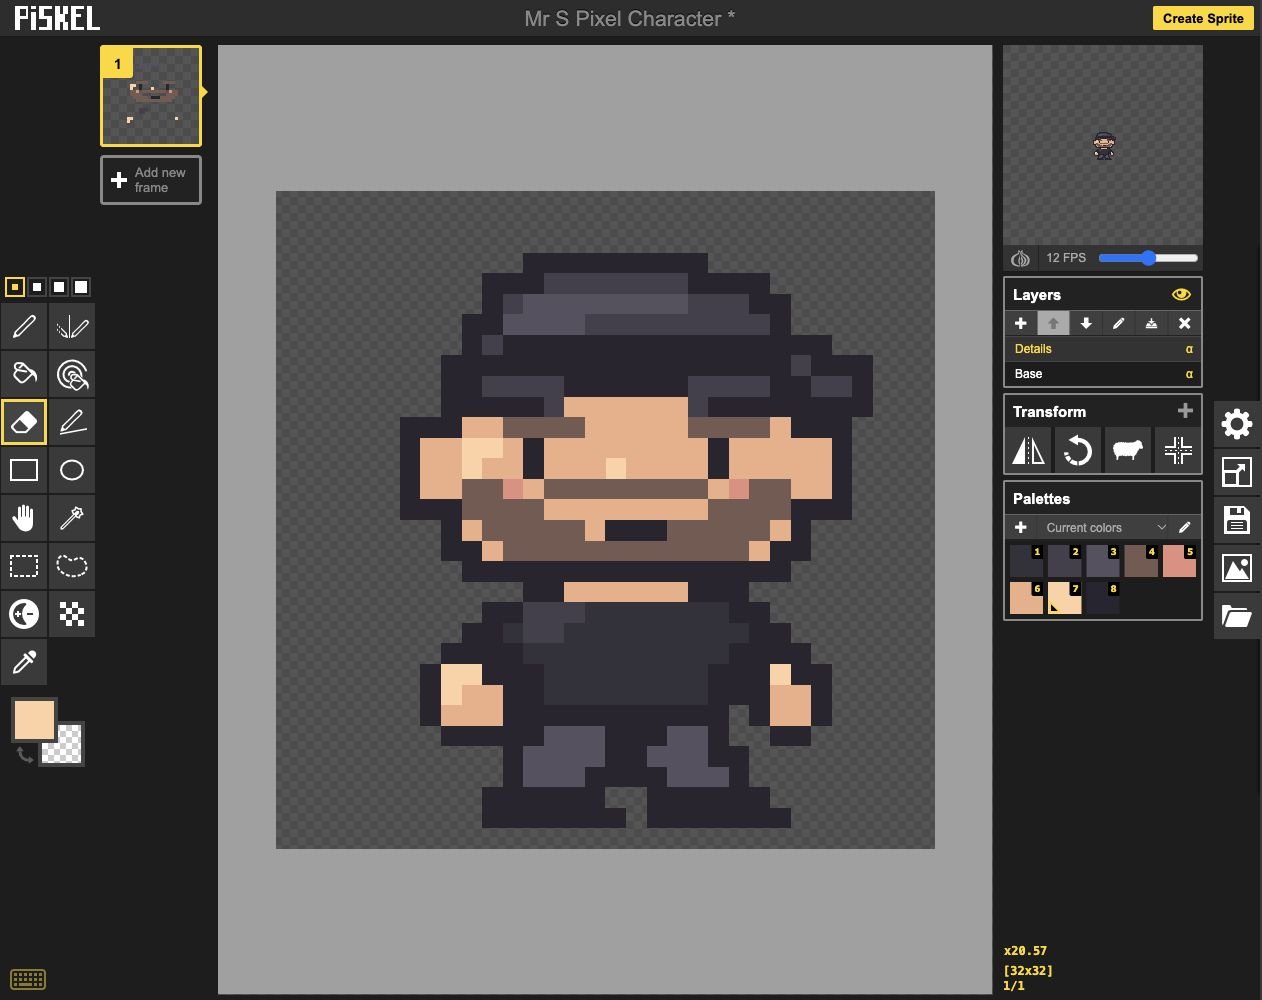
- Check: The stray pixel is gone.
- Check: Keep the important character pixels.
Check: There are no unwanted floating marks, and important outlines remain unbroken.
Step 6 — Save the standing character
- Look at the sprite in the small preview. Keep the details that help you recognize Mr. S and remove a detail that makes the picture harder to read.
- Download an editable copy of this finished standing pose before you begin animation.
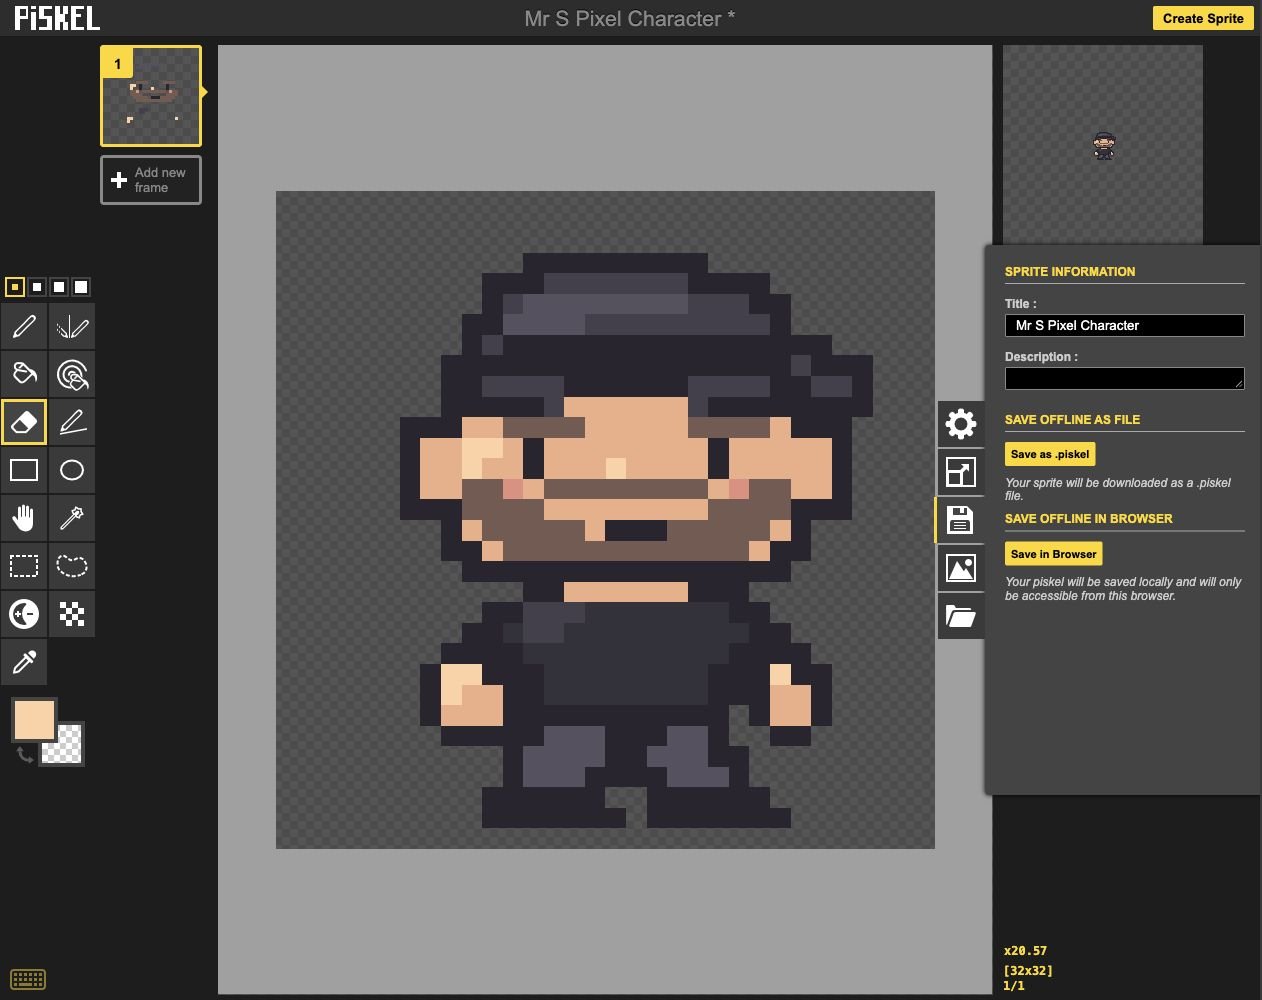
- Click: Save the editable standing pose.
- Keep: Keep this one-frame backup for comparison.
Check: You have a clean one-frame standing sprite and a .piskel backup of it.
Ready for the next step?
Return here anytime to review.
Lesson discussion
Ask a question or help a classmate. Mr. S can reply here.
Loading discussion…