
Make a Friendly Wave Animation
- Bring It to Life
- 35 minutes
- Beginner art · Ages 8+
Duplicate frames, move one arm and add a blink for a small looping animation.
Downloads
6 files
Start with a blank 32 × 32 canvas in Piskel. Use the character reference as your guide and draw each small part yourself. Keep an editable .piskel save after every lesson; PNG and GIF are exports to share; the .piskel file keeps the editable project and its layer/frame structure. Save your own work before importing a comparison.

The supplied standing character used as a visual reference. Students draw a simpler pixel version from a blank canvas.
An editable comparison of the completed character and wave. Save your own .piskel before importing another project.
Separate end-of-lesson Piskel files for checking your progress. Extract the ZIP and open only the comparison you need.

The finished transparent 32 × 32 standing picture, ready to use as one game costume.

All three 32 × 32 frames arranged side by side in one transparent 96 × 32 PNG. Import as a sprite sheet only when your game editor supports it.

A 256 × 256 enlarged animation for previewing or sharing. Keep the editable .piskel project for drawing changes.
Your goal
Create a three-frame wave, compare changes with onion skin, and choose a readable playback speed.
An animation is a set of pictures called frames, shown one after another. Start from your clean standing sprite. We will keep most pixels still and change only the arm, hand highlight and eyes.
Step 1 — Keep the standing frame
- Select the first frame in the frame list. Make sure it contains the finished standing pose.
- Keep the standing .piskel backup from the previous lesson. We are now making an animation in your working project.
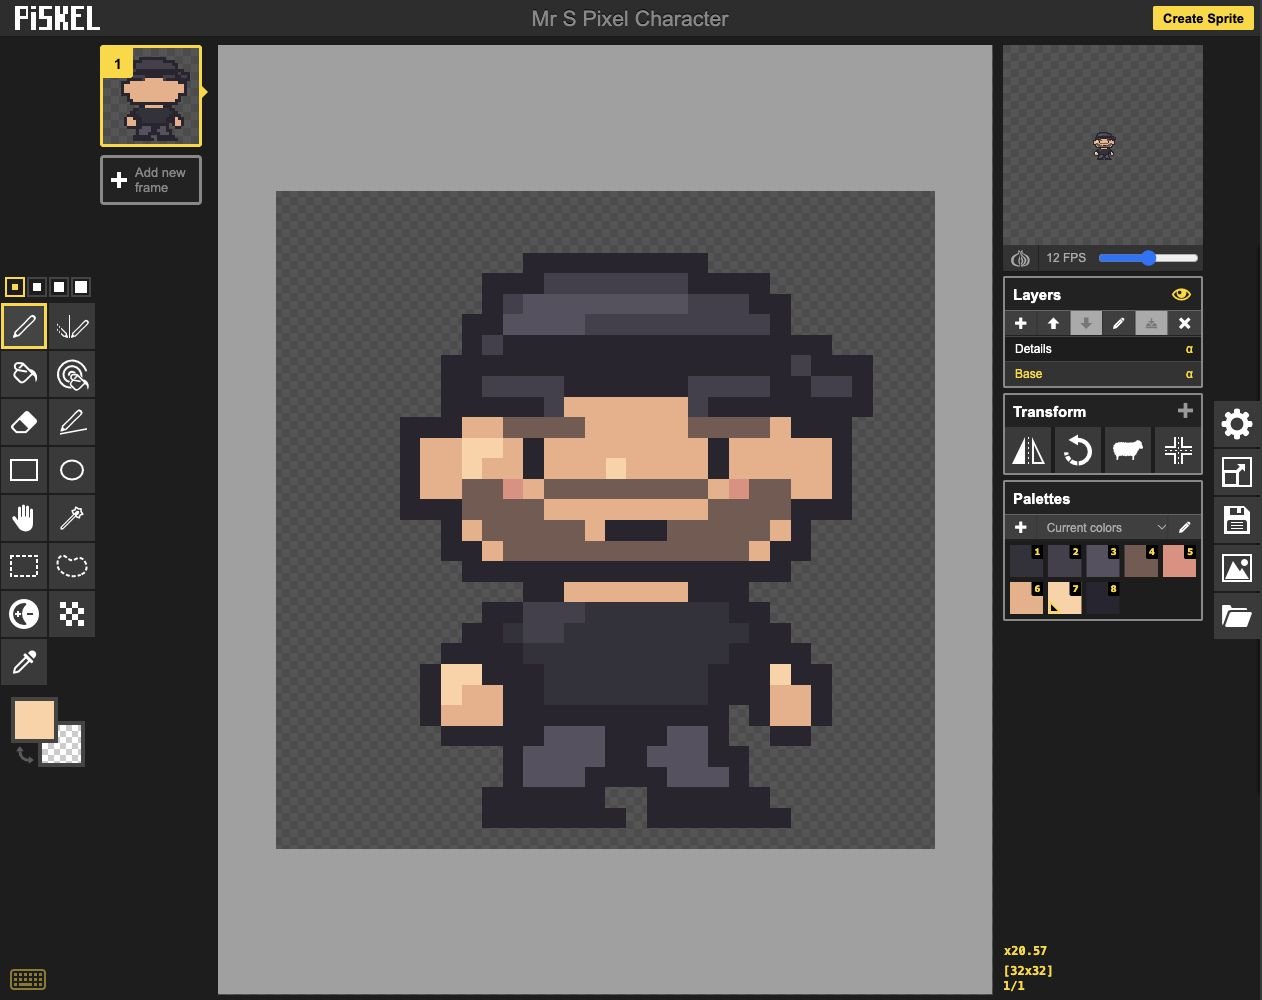
- Keep: Keep frame 1 as the standing pose.
- Check: The small preview combines both layers.
Check: Frame 1 is the complete standing character, with Base and Details layers.
Step 2 — Duplicate the frame
- Use the first frame’s Duplicate control to make a copy after it.
- Choose the new second frame. Duplicate copies the drawing; Add a new frame makes a blank one.
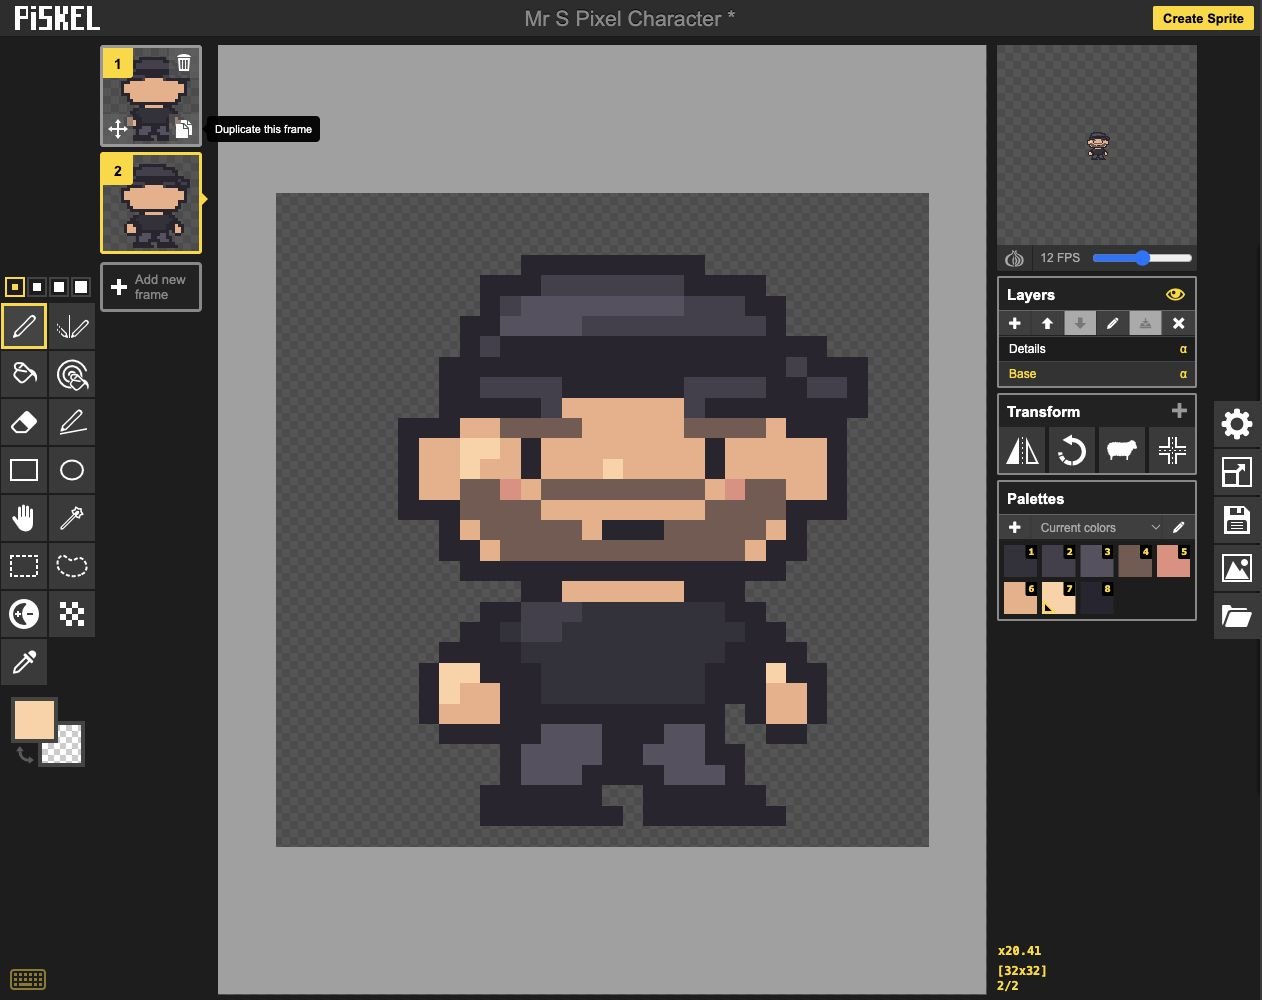
- Click: Use Duplicate this frame.
- Check: Select the new second frame.
Check: Frames 1 and 2 currently contain the same drawing. Frame thumbnails show only the selected layer, so a Details thumbnail may look like a face without a body. The small preview combines all visible layers.
Step 3 — Raise one arm
- On frame 2, select Base. Erase the resting arm and hand on the side shown in the picture.
- Redraw that arm in a raised waving pose. Keep the head, body, feet and other arm in their original positions.
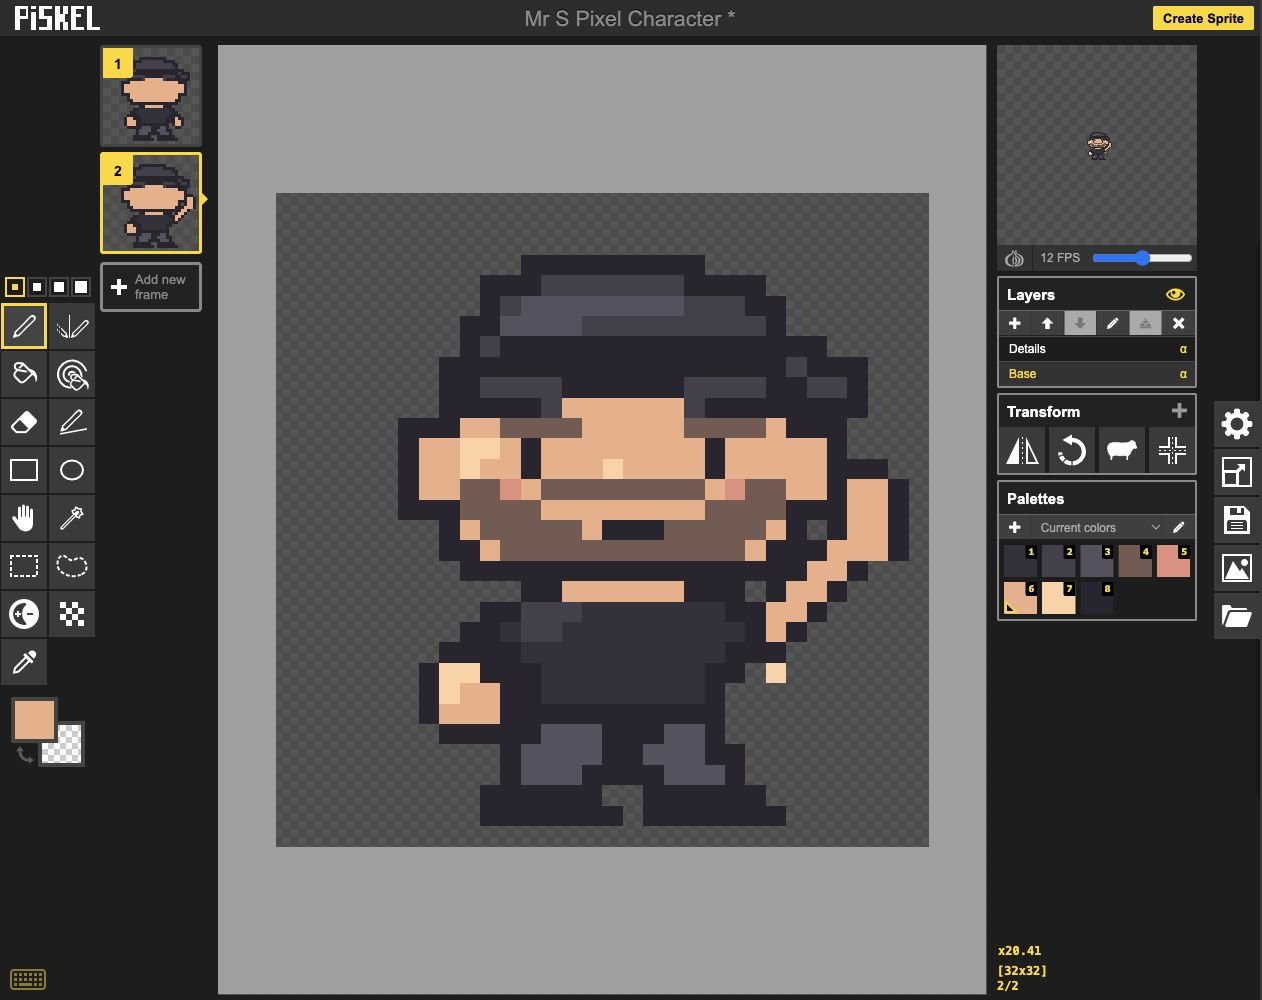
- Check: Edit the arm on Base.
- Add: Replace one resting arm with a wave.
Check: Only one arm changes between the standing frame and the waving frame.
Step 4 — Move the hand highlight
- Stay on frame 2 and select Details. Remove the highlight left at the old hand position.
- Add a small highlight on the raised hand. Keep the same light direction used in the standing pose.
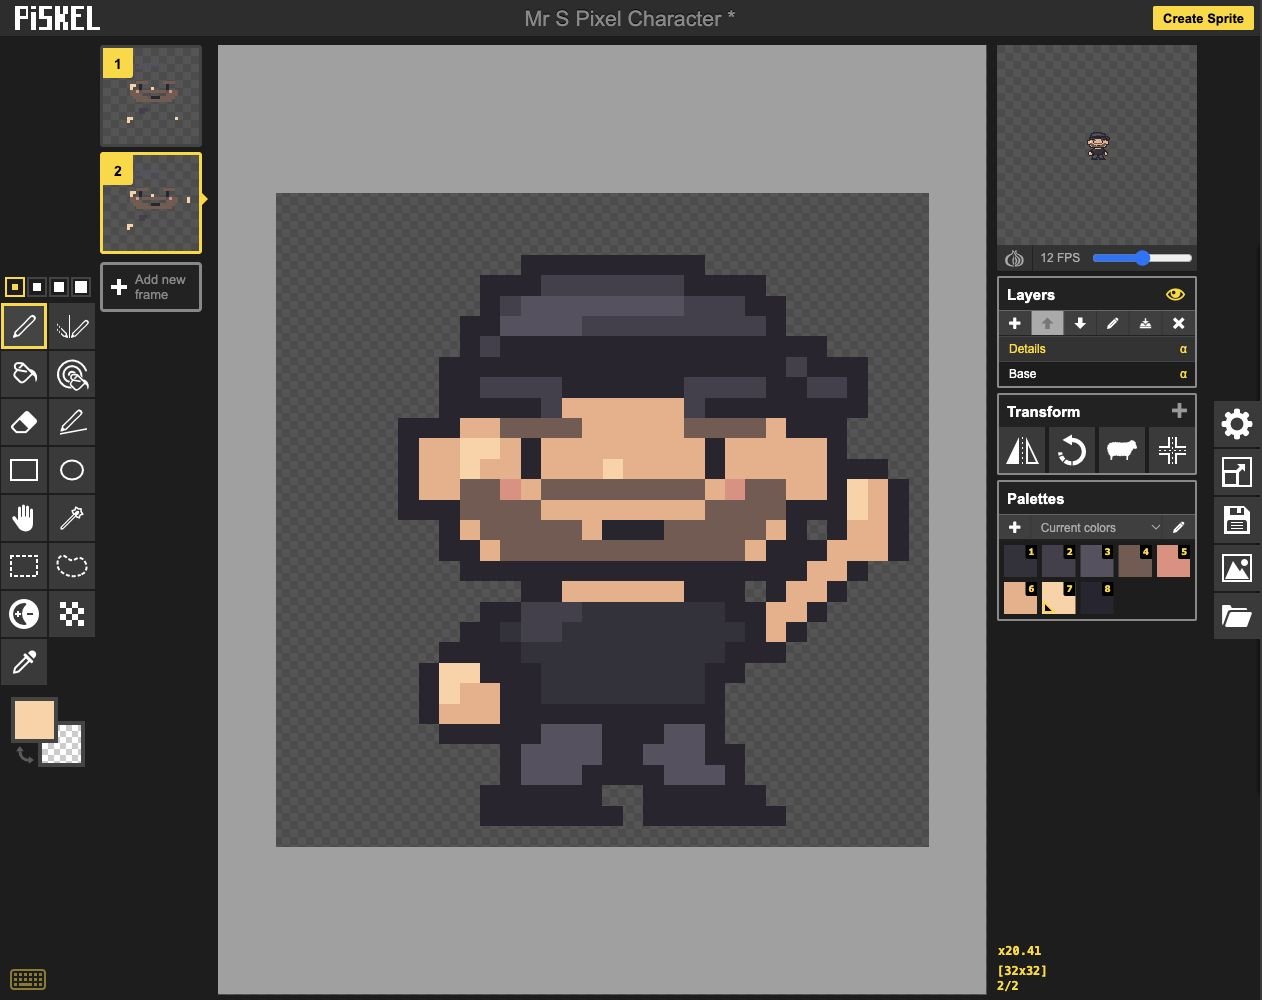
- Click: Select Details to move its highlight.
- Add: Light the raised hand.
- Check: Remove the old floating highlight.
Check: The hand highlight moves with the hand; no bright mark floats beside the shirt.
Step 5 — Compare with onion skin
- Click the onion-shaped button below the preview, Toggle onion skin (Alt + O), to compare nearby frames as a faint guide.
- Compare the Base layer, then the Details layer. Onion skin helps you check the selected layer’s changes. Turn it off when you want a clean view.
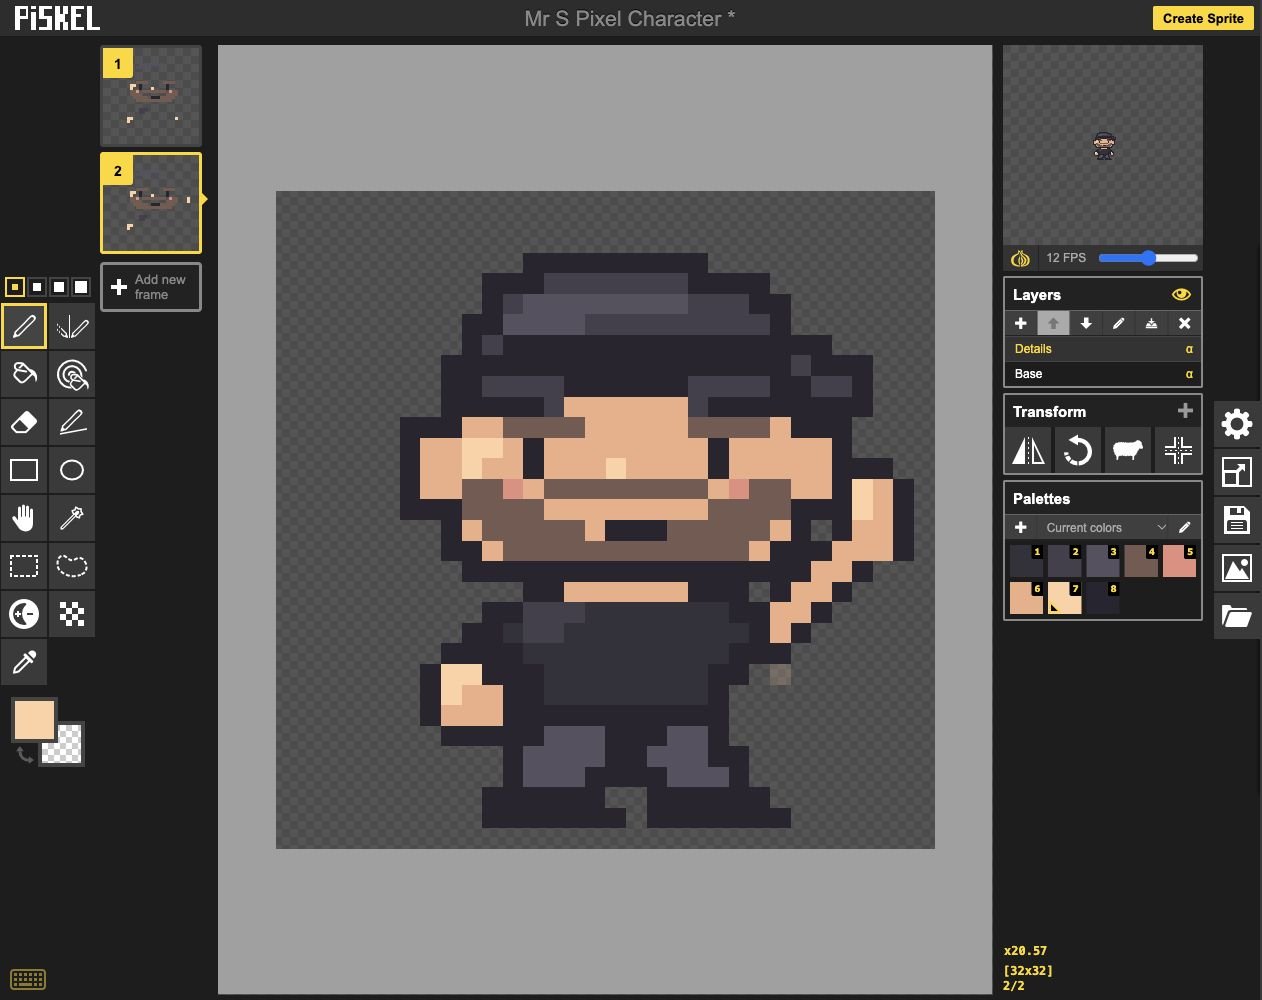
- Click: Toggle onion skin below the preview.
- Check: A faint previous-frame guide helps alignment.
Check: The head and feet stay aligned while the arm changes position.
Step 6 — Add a blink frame
- Duplicate frame 2 to make frame 3. Keep the raised arm.
- On frame 3’s Details layer, change the open eyes into short closed-eye marks. Leave frames 1 and 2 unchanged.
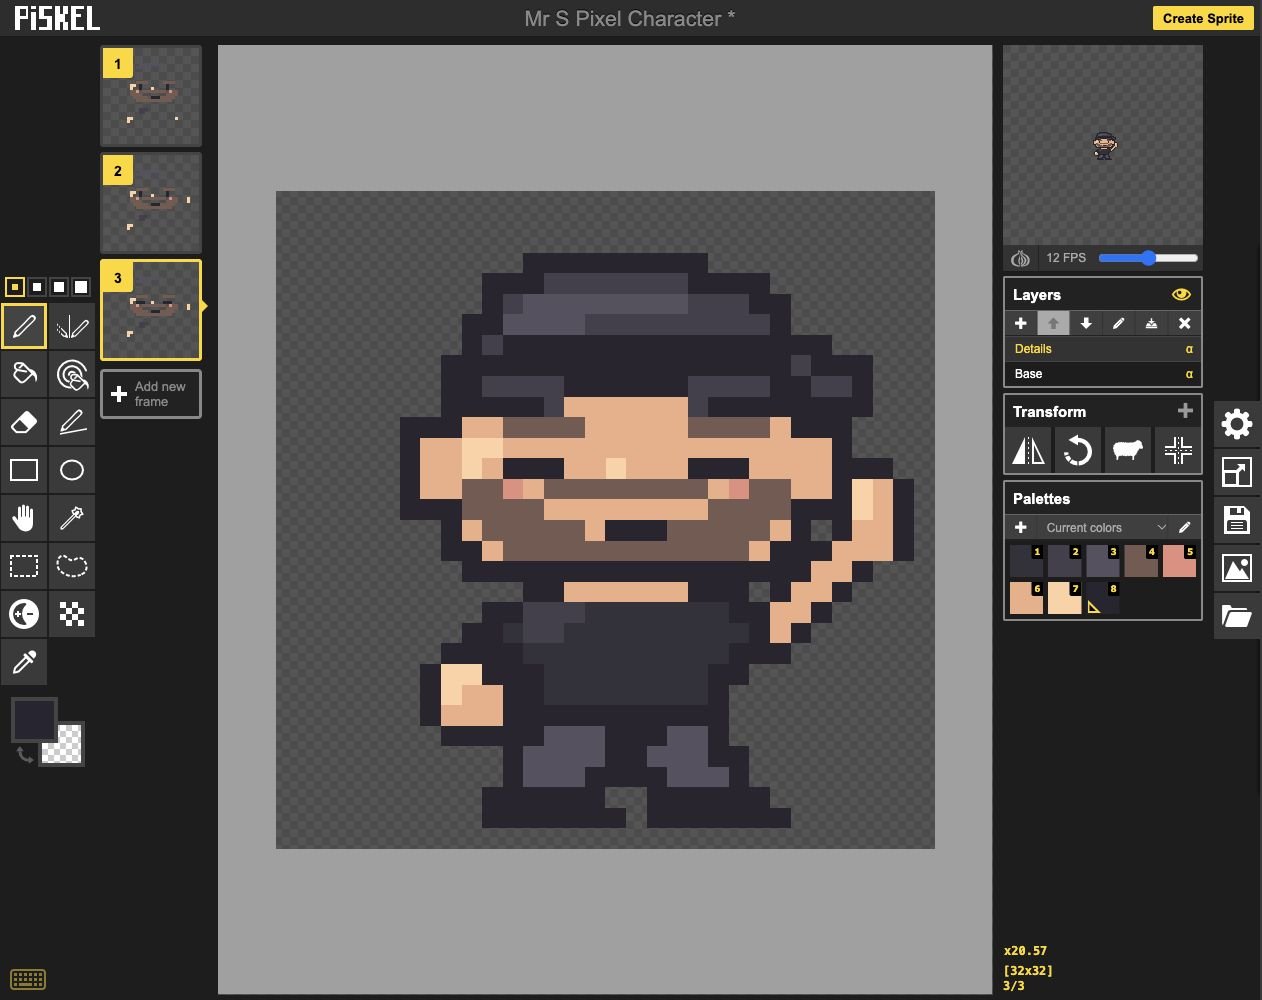
- Check: Frame 3 holds the blink.
- Add: Use short closed-eye marks.
Check: The frame list shows standing, waving with open eyes, and waving with a blink.
Step 7 — Set a gentle preview speed
- Find the FPS slider below the preview. FPS means frames per second. Drag the slider until the label reads 3 FPS.
- Watch the preview. Increase or decrease the speed a little to compare how the motion feels, then return to the lesson’s example speed.
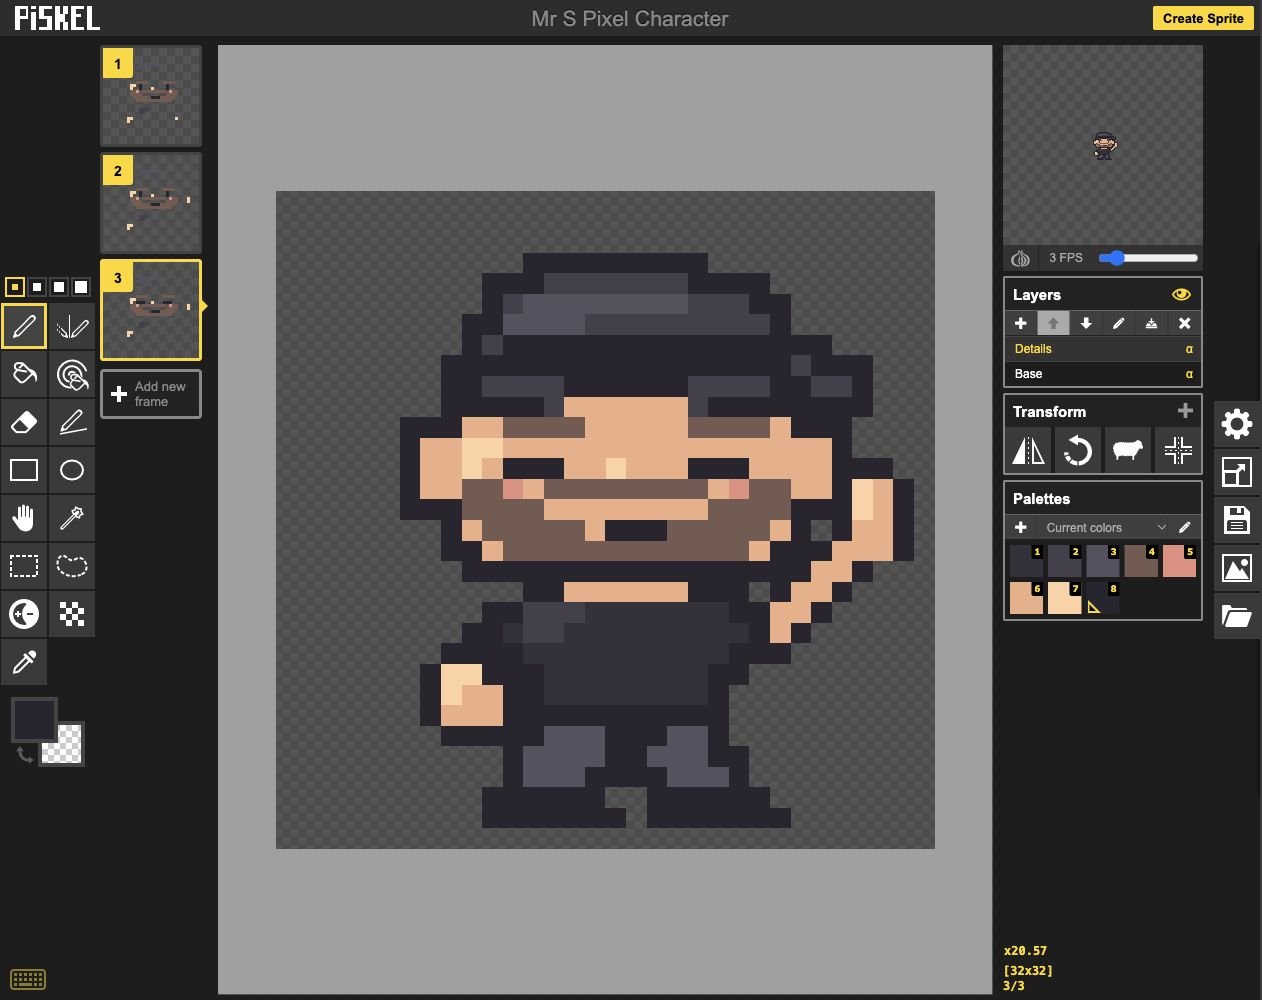
- Add: Set the preview to 3 FPS.
- Keep: Keep three intentional frames.
Check: You can see each pose clearly, and the wave does not flash too fast.
Step 8 — Check the looping animation
- Watch several loops. The character should stand, raise a hand, blink, then return to standing.
- Click each frame and compare it with the pictures. Repair a jumping head, floating highlight or missing eye on the correct frame and layer. Save the editable animation.
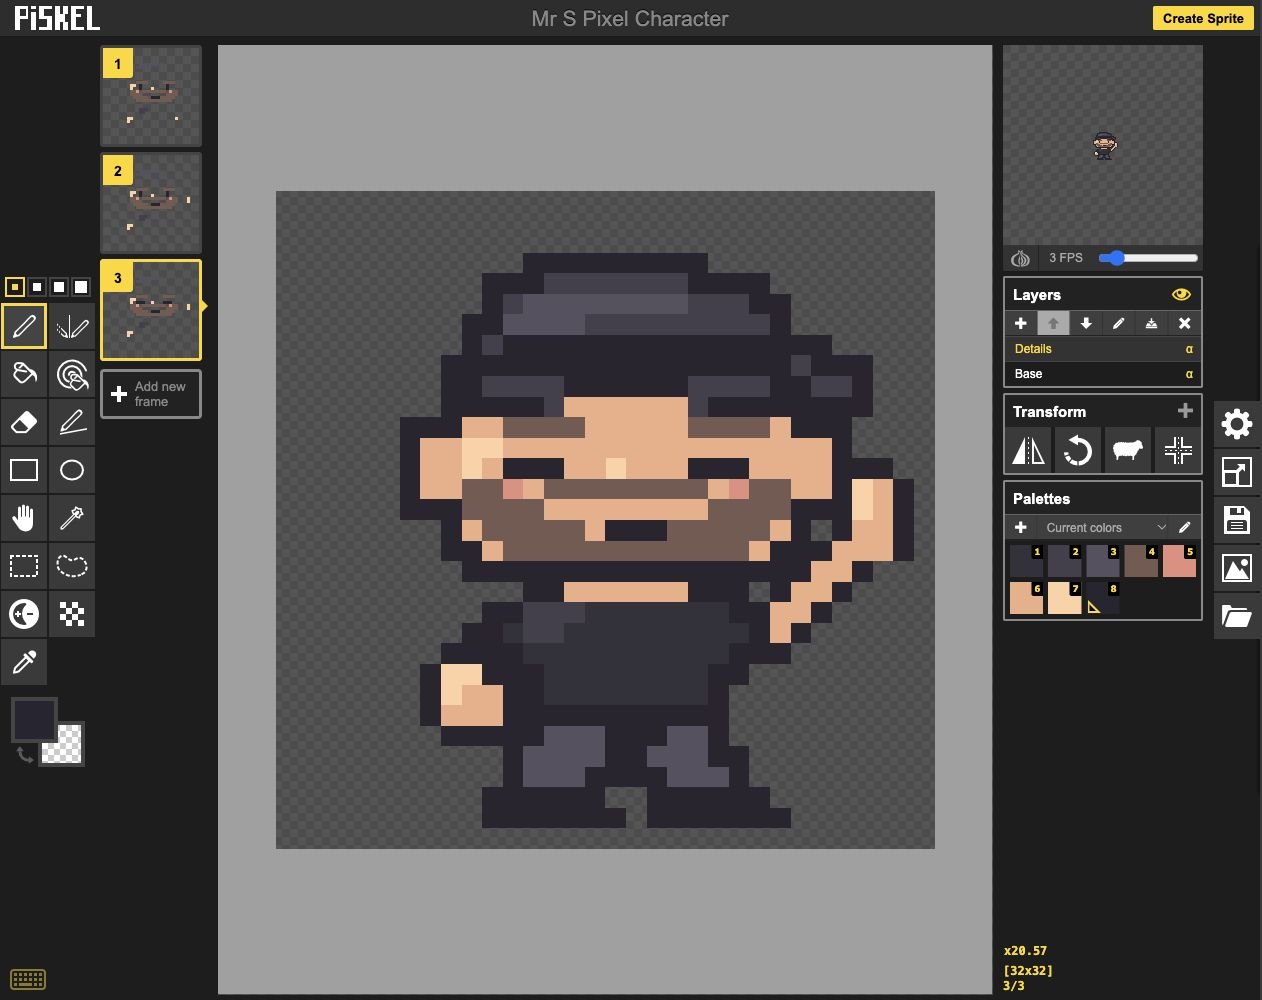
- Check: Watch the combined animation preview.
- Check: Check the final 3 FPS speed.
Check: The animation loops cleanly, and your frame list contains three intentional poses.
Ready for the next step?
Return here anytime to review.
Lesson discussion
Ask a question or help a classmate. Mr. S can reply here.
Loading discussion…